Barbie cakes have become the shining centerpiece of countless birthday parties, celebrations, and memorable events. With their eye-catching design, whimsical elegance, and vibrant colors, Barbie cakes are more than just desserts—they’re edible works of art that bring childhood dreams to life. Whether you’re a home baker looking to surprise your little one or a professional pastry chef aiming to wow your clients, mastering the art of making a Barbie cake can be both a creative and rewarding experience.
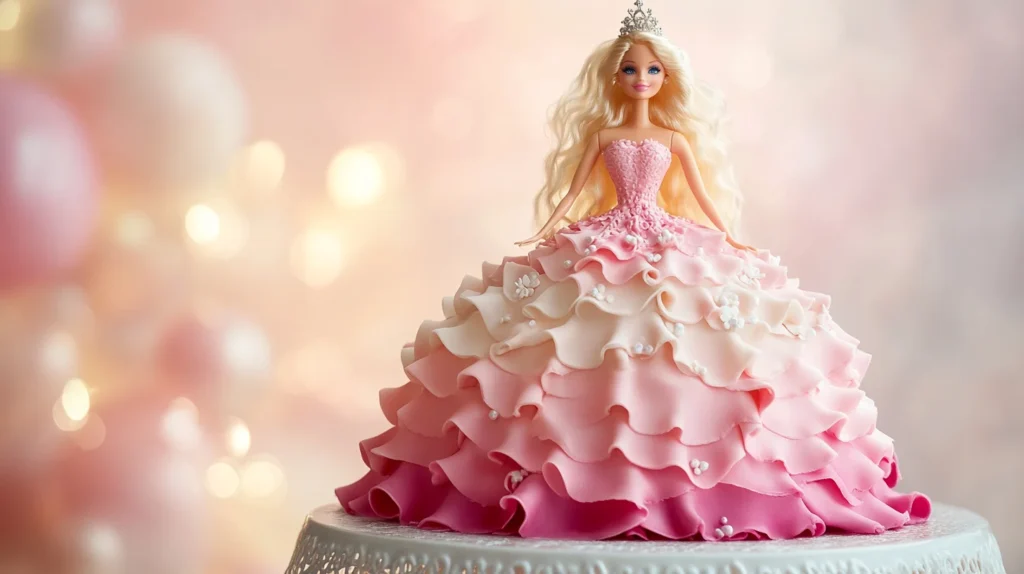
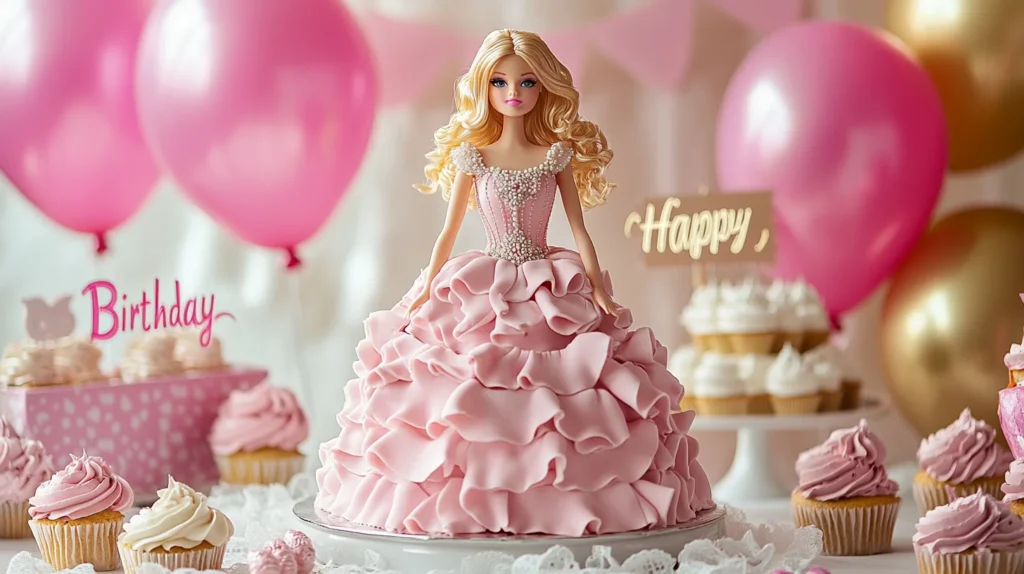
A Barbie cake typically features a full doll model encased in a beautifully decorated gown made entirely of cake and frosting. From classic pink ruffles to glamorous sequins and princess-style layers, the design possibilities are endless. In this comprehensive guide, we’ll walk you through every step of crafting your own Barbie cake—from selecting the right base to choosing design themes, baking techniques, frosting options, and creative decorating ideas.
If you’ve ever wondered how to make a Barbie cake that looks professionally made but can be done right at home, you’re in the right place. This article will cover everything you need to know, whether you’re preparing a Barbie birthday cake, a Barbie-themed celebration cake, or just want to impress your family and friends with a doll cake that turns heads. Let’s dive into the magical world of Barbie cakes and discover how to make one that’s picture-perfect and delicious!

Tools and Ingredients for Making a Barbie Cake
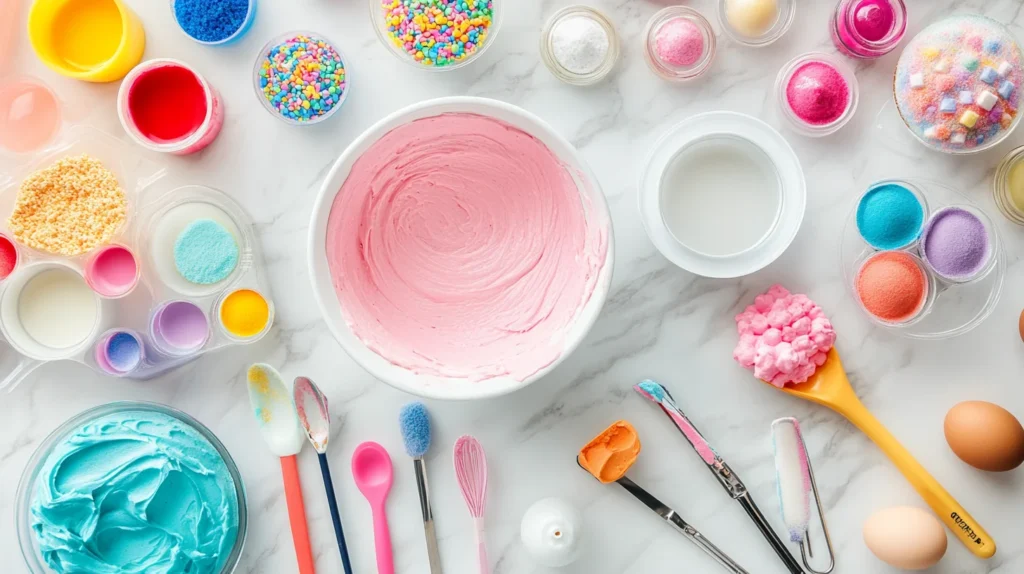
Before embarking on the exciting journey of making a Barbie cake, it’s essential to gather the right tools and ingredients. These items will ensure that your cake is structurally sound, visually stunning, and easy to prepare.
Step-by-Step Instructions for Creating Your Barbie Cake
Creating a Barbie cake requires a combination of basic baking tools and specialized equipment. Here’s a list of what you’ll need:
Baking Tools
- Cake Pans: Use a rounded or dome-shaped pan for the skirt and standard circular pans for additional layers.
- Mixing Bowls: Essential for preparing the cake batter and frosting.
- Electric Mixer or Whisk: Speeds up the mixing process, ensuring a smooth and airy batter.
- Measuring Cups and Spoons: Precision is key for baking success.
- Cooling Racks: Allows the cakes to cool evenly and prevents sticking.
Set your oven to 350°F (175°C) and lightly grease your cake pans to prepare them for baking. Use a trusted vanilla or Mexican Cake Recipe for a flavorful twist. Once baked, allow the cakes to cool completely before assembly.
Assembling Tools
- Serrated Knife: For leveling and shaping the cake.
- Cake Turntable: Makes it easier to apply frosting and decorations.
- Spatulas: Use an offset spatula for smooth frosting application and a straight spatula for cutting.
- Wooden Dowels or Skewers: Provides structural support for taller cakes.
Decorating Tools
- Piping Bags and Tips: For intricate designs and details.
- Fondant Smoother: Helps create a flawless finish for fondant-covered cakes.
- Edible Food Colors: Adds vibrant hues to frosting and fondant.
- Decorative Sprinkles and Edible Glitter: Enhances the final design for a magical touch.
Apply a crumb coat before covering the skirt with fondant or frosting. Use Cheesy & Spicy Buffalo Dip-inspired bold colors for an eye-catching theme.
Key Ingredients for Baking and Decoration
Cake Ingredients
- Flour: All-purpose or cake flour for a soft and fluffy base.
- Sugar: Granulated sugar for sweetness.
- Butter: Adds moisture and richness to the cake.
- Eggs: Acts as a binding agent and enhances the texture.
- Milk or Buttermilk: Ensures a moist and tender crumb.
- Vanilla Extract: Adds a classic flavor to the cake.
Frosting Ingredients
- Butter: Forms the base of buttercream frosting.
- Powdered Sugar: Creates a smooth and sweet consistency.
- Heavy Cream: Adds a creamy texture to the frosting.
- Flavor Extracts: Customize the frosting with vanilla, almond, or other flavors.
Fondant and Decoration Ingredients
- Fondant: Ready-made or homemade fondant for the Barbie dress design.
- Gel Food Coloring: Perfect for dyeing fondant and frosting without altering consistency.
- Edible Pearls or Beads: Adds sophistication to the design.
- Edible Glue or Water: Helps attach decorations to the fondant.
Choosing the Right Barbie Doll
When selecting the Barbie doll for your cake, opt for one with removable legs or a mini version. Wrap the doll’s lower body in plastic wrap to keep it clean and food-safe.

Step-by-Step Guide to Making a Barbie Cake
Now that you’ve gathered all the necessary tools and ingredients, it’s time to bring your Barbie cake to life. Follow this detailed, step-by-step guide to ensure a flawless result.
Preparing the Cake Base
Baking the Perfect Barbie Cake Base
- Preheat Your Oven: Set the oven to 350°F (175°C) and grease your pans with butter or non-stick spray.
- Prepare the Batter: Use your preferred recipe or a cake mix. Divide the batter between a dome-shaped pan and circular pans for extra layers.
- Bake the Cakes: Bake according to your recipe’s instructions. The dome-shaped pan may take slightly longer. Check with a toothpick for doneness.
- Cool the Cakes: Allow the cakes to cool completely on a cooling rack to prevent crumbling during assembly.
Leveling the Cakes
- Use a serrated knife to trim the tops of the cakes, ensuring each layer is flat. This step is crucial for a stable and uniform base.
- If needed, carve the dome-shaped cake slightly to achieve a smooth skirt shape.
Creating the Barbie Dress Shape
Stacking the Layers
- Start with the Circular Layers: Place the first circular layer on your cake turntable. Spread a thin layer of frosting to act as glue.
- Add the Dome-Shaped Layer: Place the rounded cake on top to form the skirt. Ensure the layers align perfectly.
Carving the Skirt
- Gently carve the edges of the cake to create a natural skirt silhouette. Take your time for a clean and elegant look.
Inserting the Barbie Doll Safely
- Prepare the Doll: Wrap the lower body of the Barbie doll in plastic wrap to keep it clean and food-safe.
- Insert the Doll: Carefully insert the doll into the center of the cake, ensuring it stands upright and stable.
- Support as Needed: If the doll is tall, you may need to trim the base of the cake to balance the proportions.
Applying a Crumb Coat
What is a Crumb Coat?
A crumb coat is a thin layer of frosting applied to seal in crumbs and create a smooth base for decoration.
- Spread the Frosting Evenly: Use an offset spatula to apply a thin layer of frosting over the entire cake.
- Chill the Cake: Refrigerate for 15–30 minutes to set the crumb coat.
Decorating Tips to Customize Your Barbie Doll Cake
Creating the Base Design
- Apply the Final Frosting Layer: Spread a thick and even layer of frosting over the crumb coat. Use a cake smoother for a polished look.
- Dye the Frosting: Use gel food coloring to match your desired theme.
Designing with Fondant
- Roll out the fondant to about ⅛ inch thick.
- Cut and drape the fondant over the skirt, smoothing it out with a fondant smoother.
- Trim excess fondant at the base for a neat finish.
Adding Details
- Use piping bags to create intricate patterns like lace or ruffles on the skirt.
- Attach edible pearls, glitter, or other decorations for a magical touch.
With the Barbie doll now dressed in a stunning edible gown, your masterpiece is almost complete.
Tips and Tricks for the Perfect Barbie Cake
Making a Barbie cake that’s both beautiful and structurally sound can seem daunting, but with the right techniques, it’s a breeze. Here are some tips and tricks to help you achieve professional results, even if it’s your first time baking a Barbie cake.
Ensuring Structural Stability
Proper Cake Layering
- Always ensure the layers are level and evenly stacked. Use a cake turntable to maintain precision.
- Add a small amount of frosting between each layer to act as adhesive and prevent slipping.
Using Dowels for Support
- If the cake is tall or has multiple layers, insert wooden dowels or skewers into the base for added stability.
- Cut the dowels to the exact height of the cake for seamless support.
Securing the Doll
- Wrap the Barbie doll tightly in plastic wrap to prevent any frosting or crumbs from sticking.
- Anchor the doll firmly into the center of the cake. If needed, create a small hole beforehand using a knife or cylindrical cutter.
Choosing the Right Colors and Patterns
Matching the Theme
- Use a color palette that complements the theme of the party. Popular choices include pink, pastel shades, or glittery gold.
- Experiment with patterns like polka dots, stripes, or floral designs to make the dress stand out.
Layering Colors
- For an ombre effect, use different shades of the same color in layers, blending them for a gradient look.
- Create contrasting details with white or metallic accents for a chic appearance.
Working with Fondant for Seamless Designs
Handling Fondant
- Dust your work surface with powdered sugar to prevent sticking.
- Knead the fondant until it’s soft and pliable, making it easier to roll and shape.
Achieving Smooth Coverage
- Roll the fondant evenly to avoid lumps and creases.
- Use a fondant smoother to remove air bubbles and achieve a flawless finish.
Adding Edible Accents
- Attach fondant bows, flowers, or lace patterns using edible glue or a small amount of water.
- Use food-safe molds or cutters for intricate designs that elevate the cake’s appearance.
Practicing Piping Techniques
Practice your piping designs on parchment paper before applying them to the cake. This allows you to perfect intricate details like swirls, ruffles, or lettering without the pressure of decorating directly.
With these tips in hand, your Barbie cake will not only be a feast for the eyes but also a sturdy and delicious masterpiece.
Common Mistakes to Avoid
Even with the best intentions, a few missteps can derail the creation of your Barbie cake. By being aware of these common mistakes and how to avoid them, you’ll ensure your cake is a stunning success.
Overbaking or Underbaking the Cake
The Problem
- Overbaked cakes can be dry and crumbly, making it difficult to shape and decorate.
- Underbaked cakes may collapse or have an unappetizing texture.
The Solution
- Always preheat your oven to the correct temperature.
- Use an oven thermometer to verify accuracy if your oven tends to run hot or cold.
- Perform the toothpick test by inserting it into the center of the cake. If the tester comes out clean, your cake is fully baked.
Uneven Frosting Application
The Problem
- Uneven frosting can make the cake look messy and unprofessional.
- Crumbs can mix into the frosting, ruining the smooth finish.
The Solution
- Apply a crumb coat first to seal in loose crumbs.
- Use a cake turntable and an offset spatula for smooth and even frosting application.
- Chill the cake between frosting layers to maintain structure.
Not Supporting the Doll Properly
The Problem
- A poorly secured Barbie doll can tip over, damaging the cake.
- If the doll’s legs are too long, they can distort the shape of the skirt.
The Solution
- Wrap the doll in plastic wrap and cut the cake slightly to create a snug fit.
- Use dowels or skewers to stabilize the doll and cake structure.
Ignoring the Importance of Cooling
The Problem
- Decorating a warm cake can cause frosting to melt and slide off.
- Warm layers are more likely to crumble when stacked.
The Solution
- Allow all cake layers to cool completely before assembling and frosting.
- If you’re in a hurry, refrigerate the layers for 20–30 minutes to speed up the cooling process.
Skipping Planning and Design
The Problem
- Jumping straight into decoration without a plan can lead to design inconsistencies.
- Running out of frosting or decorations midway can derail the process.
The Solution
- Sketch out your design beforehand, including the colors, patterns, and details you want to include.
- Measure and prepare extra quantities of frosting, fondant, and decorations to account for unexpected needs.
Avoiding Last-Minute Stress
Start your Barbie cake project a day or two before the event. This gives you time to fix any unexpected issues and ensures the cake is ready to impress.
By steering clear of these pitfalls, you’ll save time, reduce frustration, and create a Barbie cake that looks and tastes amazing.
Creative Variations for Barbie Birthday Cakes
Barbie cakes offer endless possibilities for customization, allowing you to tailor the design to suit specific themes, characters, and personal preferences. Whether you’re aiming for a classic princess look or something entirely unique, these creative variations will inspire you to think outside the box.
Themes and Styles for a Unique Barbie Cake Design
Princess Barbie Cake
- Incorporate elements of royalty such as a tiara, pearl accents, and a glittery fondant dress.
- Use pastel colors like pink, lavender, and baby blue for a fairytale vibe.
Career Barbie Cake
- Reflect Barbie’s various career roles by incorporating themed accessories. For instance:
- A chef Barbie could feature a cake adorned with edible tools like rolling pins or whisks.
- A doctor Barbie could have a sleek white fondant dress with a stethoscope detail.
Mermaid Barbie Cake
- Create a mermaid tail that cascades down the skirt using fondant scales in iridescent colors.
- Add sea-themed decorations like edible shells, coral, and shimmering pearls.
Adding Edible Accessories
Jewelry and Crowns
- Use edible pearls, metallic luster dust, and sugar gemstones to create dazzling necklaces and tiaras.
- For a crown, mold fondant into a circular shape, brush with edible gold paint, and let it harden before placing it atop the cake.
Ribbons and Bows
- Roll fondant into thin strips and tie them into bows to add a playful touch.
- Layer fondant ribbons around the skirt for a more sophisticated design.
Edible Flowers
- Handcraft roses, daisies, or other blooms from fondant or gum paste.
- Arrange the flowers in cascading patterns for a romantic and elegant look.
Alternative Cake Flavors
Classic Options
- Vanilla Sponge Cake: Light and versatile, pairs well with any frosting.
- Chocolate Cake: A rich option that adds a decadent touch to the Barbie cake.
Unique Flavors
- Red Velvet Cake: Vibrant and festive, perfect for celebratory occasions.
- Lemon Cake: A zesty option that adds freshness to your cake.
Filling Ideas
- Add layers of flavored fillings like raspberry jam, chocolate ganache, or buttercream in complementary colors to elevate the taste.
Incorporating Party Themes
Seasonal Themes
- For a winter celebration, design the dress with white and silver frosting to resemble snowflakes and icy textures.
- For a summer party, go for bright floral patterns and tropical decorations.
Personalization
- Add the birthday person’s name or age using piped frosting or fondant cutouts.
- Match the cake design to the party’s décor or invitation theme for a cohesive aesthetic.

Bonus Tip: Collaborative Decorating
If the cake is for a child, involve them in the decorating process. They can choose the colors, patterns, and even help with simple tasks like adding sprinkles. This makes the cake even more special and personal.
These creative ideas will ensure that your Barbie cake is not only unique but also memorable.
A Barbie cake is the perfect blend of creativity and sweetness, making any occasion extra special. Whether you’re trying a classic vanilla cake or something adventurous like a Crispy Chicken-Inspired Savory Cake, the key is to have fun and experiment with flavors and decorations.
Happy Baking! 🎂✨
Frequently Asked Questions
How many people will a Barbie cake feed?
The number of servings a Barbie cake provides depends on the size of the cake and how it is sliced. On average:
- Standard Barbie Cake: Made with a dome-shaped pan and additional layers, it can serve 15–20 people.
- Larger Barbie Cakes: With multiple added layers or a larger base, it can serve 20–30 people.
For precise servings, consider the thickness of your layers and the size of your portions.
How many cake mixes for a Barbie cake pan?
For a typical Barbie cake pan or dome-shaped pan:
- One Box Mix: Suitable for smaller pans, yielding about 4–5 cups of batter.
- Two Box Mixes: Recommended for larger or deeper pans to ensure you have enough batter for height and stability.
It’s always better to prepare extra batter, as any leftover can be used to make cupcakes or a backup layer.
When were Barbie cakes popular?
Barbie cakes gained widespread popularity in the 1980s and 1990s, as Barbie dolls became iconic symbols of style and creativity.
- These cakes were especially common at children’s birthday parties, where they served as both dessert and centerpiece.
- Over the years, their popularity has persisted due to Barbie’s timeless appeal and the creative freedom these cakes offer to bakers.
Is it possible to use a bundt pan when making a Barbie cake?
Yes, a bundt pan can be used to create the skirt base for a Barbie cake:
- The bundt pan’s hole in the center is ideal for inserting the doll securely.
- Ensure the bundt pan is deep enough to provide the required height for the cake.
- You may need to bake additional layers to add height or cover gaps for a seamless design.
Using a bundt pan is a practical and creative alternative if you don’t have a dome-shaped pan.
Conclusion
Creating a Barbie cake is about much more than baking—it’s about celebrating creativity, spreading joy, and crafting a magical experience that kids (and even adults!) will remember for years to come. Whether you’re a beginner experimenting in the kitchen or a skilled cake decorator aiming to take your designs to the next level, a Barbie cake offers a perfect canvas for your imagination.
We’ve explored everything from design inspiration to baking techniques, structural tips, frosting styles, and creative decoration ideas. Remember, you don’t need to be a pastry expert to create a stunning Barbie doll cake. With a bit of patience, planning, and passion, anyone can craft a cake that looks like it came straight out of a bakery window.
So go ahead—pick your Barbie theme, preheat your oven, and get ready to bring your vision to life. Whether it’s a princess gown, a fashionista outfit, or a fantasy theme, your Barbie cake is sure to steal the spotlight. After all, nothing says “wow” quite like a beautiful doll cake standing tall in a swirl of colorful frosting!

Barbie Cake: A Beautiful Princess Doll Cake for Special Occasions
Equipment
- 3 (6-inch) or 2 (8-inch) round cake pans
- Mixing bowls
- Hand mixer or stand mixer
- Offset spatula
- Serrated knife (for shaping)
- Cake turntable (optional, for easier decorating)
- Rolling pin (if using fondant)
- Piping bags and decorating tips
- Barbie doll (legs wrapped in plastic wrap)
- Cake board for stability
Ingredients
- For the Cake:
- 2 ½ cups all-purpose flour
- 2 ½ teaspoons baking powder
- ½ teaspoon salt
- 1 cup unsalted butter softened
- 1 ¾ cups granulated sugar
- 4 large eggs
- 1 tablespoon vanilla extract
- 1 cup whole milk
- Food coloring optional, for ombré layers
- For the Buttercream Frosting:
- 1 ½ cups unsalted butter softened
- 4 cups powdered sugar
- 2 teaspoons vanilla extract
- 3 tablespoons heavy cream or milk
- Food coloring for dress design
- For Fondant Optional:
- 2 lbs store-bought fondant or homemade fondant
- Edible pearls sprinkles, or edible glitter for decoration
Instructions
- Step 1: Bake the Cake Layers
- Preheat the oven to 350°F (175°C). Grease and line your cake pans with parchment paper.
- In a bowl, whisk together flour, baking powder, and salt. Set aside.
- In a large mixing bowl, beat butter and sugar until fluffy.
- Add eggs one at a time, mixing well after each addition. Stir in vanilla extract.
- Gradually mix in the dry ingredients, alternating with milk, starting and ending with flour.
- Optional: Divide the batter into separate bowls and tint each layer with food coloring for an ombré effect.
- Pour the batter into the prepared cake pans and bake for 30–35 minutes, or until a toothpick inserted in the center comes out clean.
- Let the cakes cool completely before assembly.
- Step 2: Prepare the Barbie & Assemble the Cake
- Wrap the Barbie doll’s legs in plastic wrap to protect it from the cake.
- Stack the cake layers on top of each other using buttercream frosting between each layer.
- Carefully carve the cake into a dome shape to resemble the Barbie’s gown.
- Cut a hole in the center and gently insert the wrapped Barbie doll.
- Step 3: Frost and Decorate the Cake
- Apply a crumb coat of buttercream and chill the cake for 15 minutes.
- Final Frosting: Use an offset spatula to apply a smooth buttercream finish or use a piping bag for decorative ruffles.
- If using fondant, roll it out and drape it over the cake for a smooth, elegant finish.
- Add edible pearls, sprinkles, glitter, or piping details to enhance the dress design.
- Step 4: Serve & Enjoy
- Carefully slice around the doll’s base to serve.
- Store leftovers in an airtight container in the fridge for up to 3 days.
Notes
Fondant or Buttercream? If you prefer easy decorating, buttercream is best. If you want a smoother, elegant finish, go for fondant.
Doll Selection: If using a tall Barbie, bake an extra layer to adjust the height.
Make Ahead: Cake layers can be baked a day in advance and stored wrapped in plastic wrap.

