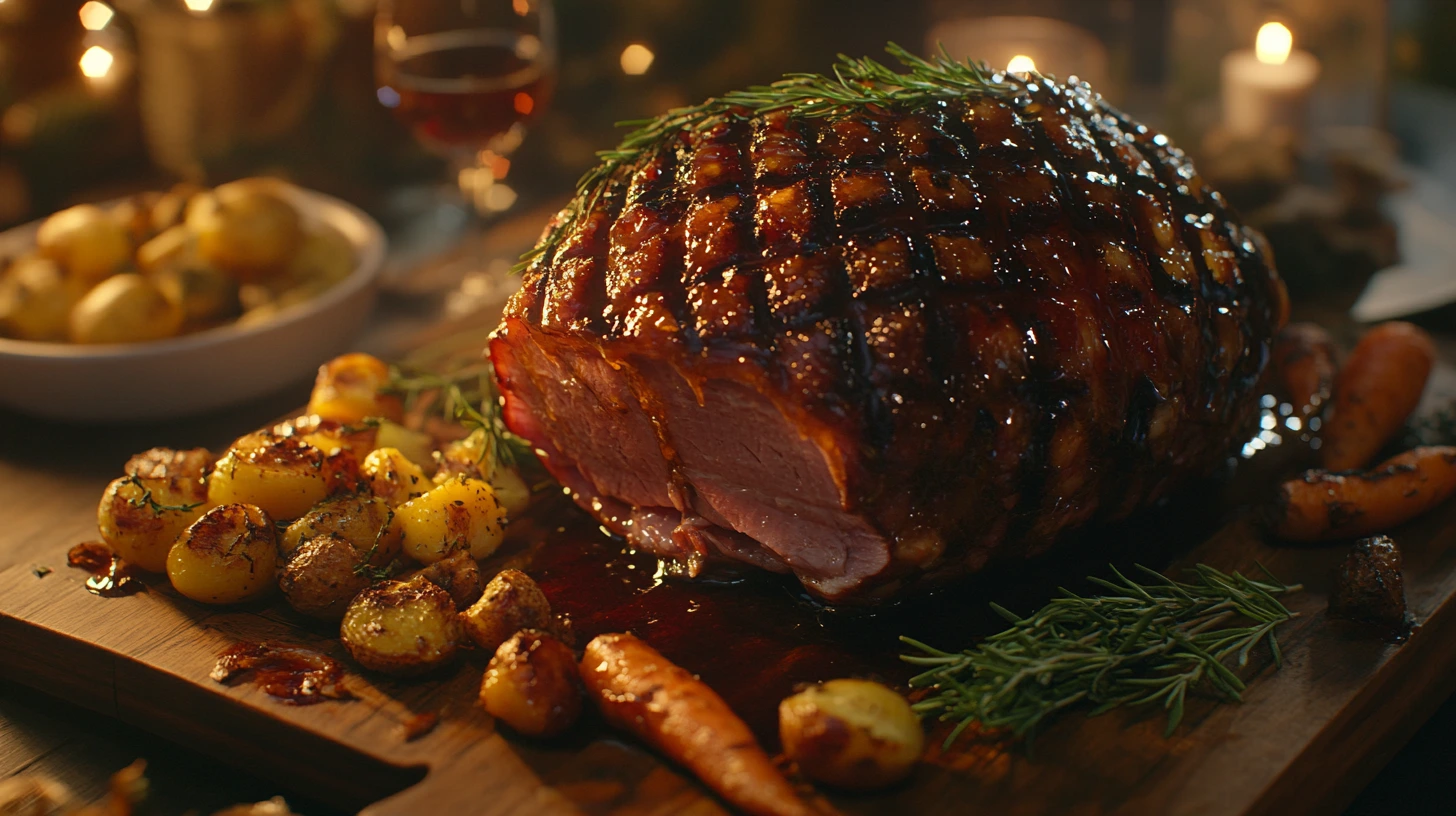
Easter is a time for gathering with family and friends, and no holiday feast is complete without a beautifully cooked ham. While traditional baked ham has been a staple for generations, grilled Easter ham offers a smoky, caramelized crust with juicy and tender meat that will take your holiday meal to the next level.
Grilling a ham may seem unconventional to some, but it’s an easy and rewarding way to infuse deep flavors into the meat. Whether you’re a seasoned grill master or trying it for the first time, this guide will walk you through everything you need to know to grill the perfect Easter ham. From selecting the right cut to applying the perfect glaze and using the best grilling techniques, we’ve got you covered!
In this comprehensive guide, you’ll learn:
Why grilling ham enhances its flavor and texture
How to choose the best ham for grilling
Step-by-step instructions for grilling ham to perfection
The best rubs, marinades, and glazes for a delicious finish
Side dishes and leftover ideas to make the most of your Easter meal
Ready to impress your guests with a show-stopping grilled Easter ham? Let’s dive in!

Why Choose Grilled Ham for Easter?
Easter ham is a time-honored tradition, but grilling it instead of baking unlocks a whole new level of flavor. Here’s why you should consider grilling your ham this Easter:
1. Enhanced Flavor
Grilling creates a rich, smoky flavor that baking simply cannot match. The caramelization of the glaze, combined with the char from the grill, enhances the ham’s natural sweetness.
2. Juicier Meat
The indirect heat from a grill helps lock in moisture, preventing the ham from drying out like it can in an oven. When cooked properly, grilled ham remains juicy and tender.
3. Crispy, Caramelized Exterior
The high heat of a grill allows the glaze to caramelize perfectly, creating a crisp, flavorful crust that enhances every bite.
4. Saves Oven Space
With the oven free, you can easily prepare other Easter dishes like casseroles, roasted vegetables, and desserts while your ham cooks outdoors.
5. Outdoor Cooking Enjoyment
Springtime Easter celebrations are the perfect opportunity to grill outdoors. Enjoy the fresh air while cooking up a mouthwatering centerpiece for your feast.
Now that you know why grilling your Easter ham is a game-changer, let’s move on to choosing the perfect ham for your grill.
Choosing the Perfect Ham
Selecting the right ham is the first step to achieving a delicious and flavorful grilled Easter ham. Not all hams are created equal, and understanding the different types will help you make the best choice for grilling.
1. Bone-In vs. Boneless Ham
- Bone-In Ham – Offers better flavor and moisture retention due to the bone, making it ideal for grilling. It also creates a beautiful presentation for Easter.
- Boneless Ham – Easier to slice but may dry out more quickly on the grill. If you choose boneless, be extra cautious with temperature control to keep it juicy.
👉 Best choice for grilling: Bone-in, half-ham (shank or butt portion).
2. Smoked vs. Fresh Ham
- Smoked Ham – Most hams sold in stores are pre-smoked, which means they are already cooked and just need to be reheated and flavored on the grill.
- Fresh (Uncured) Ham – This is a raw cut of pork and needs to be fully cooked. Grilling fresh ham requires a longer cooking time and is less common for Easter feasts.
👉 Best choice for grilling: Smoked, fully cooked ham to speed up grilling time and ensure great flavor.
3. Spiral-Cut vs. Whole Ham
- Spiral-Cut Ham – Convenient and easy to serve but can dry out quickly on the grill since it’s pre-sliced.
- Whole Ham – Retains more moisture and allows for better control of seasoning and glazing.
👉 Best choice for grilling: Whole, bone-in ham for the best texture and juiciness.
4. Best Size for Grilled Ham
- A 6-10 pound ham is perfect for grilling and will serve 8-12 people.
- Larger hams (over 12 pounds) take longer to cook and can be tricky to manage on the grill.
5. Choosing the Right Cut
There are two main cuts of ham to consider:
- Shank Portion – More flavorful and easier to carve but has more bone.
- Butt Portion – Meatier and slightly more tender, but can be trickier to slice due to irregular shape.
👉 Best choice for grilling: Butt portion (bone-in) for maximum meat with great flavor.
Final Tip: Read the Label!
When buying a ham, check the packaging:
✅ Fully Cooked or Ready to Eat – Ideal for grilling since you only need to heat and enhance the flavor.
✅ Water Content – Avoid hams labeled. Look for natural or minimally processed hams for the best texture.
Prepping the Ham for the Grill
Before you fire up the grill, properly preparing your Easter ham is essential for achieving maximum flavor and the perfect texture. This step ensures that your ham absorbs marinades, rubs, and glazes effectively while cooking evenly.
1. Thawing the Ham Properly
If your ham is frozen, it’s crucial to thaw it completely before grilling.
- Refrigerator Method: Place the ham in the fridge for 24 hours per 5 pounds.
- Cold Water Method: Submerge the ham in cold water, changing the water every 30 minutes until fully thawed.
👉 Never grill a frozen ham, as it will cook unevenly and may burn on the outside before the inside is heated.
2. Trimming the Ham (Optional)
Most hams come pre-trimmed, but if yours has a thick layer of excess fat, trimming it down to about ¼ inch helps the flavors penetrate better while still keeping it juicy.
3. Scoring the Ham for Maximum Flavor
Scoring is one of the most important steps for grilled ham. It allows marinades, rubs, and glazes to soak into the meat, adding depth to every bite.
- Use a sharp knife to cut shallow diagonal lines across the surface of the ham, about ½ inch deep.
- Create a diamond pattern by making a second set of diagonal cuts in the opposite direction.
- If you plan to add cloves, insert them at the intersections of the cuts for extra aroma and flavor.
👉 Scoring helps the ham caramelize beautifully on the grill.
4. Brining or Marinating the Ham (Optional but Recommended)
Although most store-bought hams are pre-cooked and already flavorful, soaking them in a brine or marinade before grilling enhances juiciness and taste.
Best Brine for Grilled Ham:
For a fresh (uncured) ham, you can brine it overnight in:
- 1 gallon of water
- ½ cup salt
- ½ cup brown sugar
- 1 tablespoon black peppercorns
- 2 cloves garlic, smashed
- 1 bay leaf
How to brine:
- Submerge the ham in the brine for 12-24 hours in the fridge.
- Rinse and pat dry before grilling.
👉 Brining is only necessary for fresh ham. If you’re using a pre-smoked or pre-cooked ham, a marinade or rub is a better choice.
Best Marinade for Grilled Ham:
If you want to enhance a pre-cooked ham, a simple marinade adds moisture and extra layers of flavor. Try mixing:
- ½ cup apple cider
- ¼ cup Dijon mustard
- ¼ cup honey or maple syrup
- 1 tablespoon minced garlic
- 1 teaspoon black pepper
👉 Marinate for at least 1 hour, or up to 6 hours for deeper flavor.
5. Applying a Dry Rub for Extra Flavor
A dry rub adds a delicious crust to the ham when grilled. Some excellent seasoning options include:
- Brown sugar + smoked paprika + garlic powder + black pepper
- Cinnamon + nutmeg + cloves + allspice
- Ground mustard + rosemary + thyme + orange zest
Rub the seasoning mix evenly over the scored ham, letting it sit for 30 minutes to 1 hour before grilling.
6. Preparing the Grill for Cooking
Now that your ham is prepped, it’s time to get the grill ready!
- Charcoal Grill: Use indirect heat by placing the coals on one side of the grill and the ham on the other.
- Gas Grill: Preheat to medium (300-325°F) and turn off burners on one side for indirect cooking.
- Smoker: If using a smoker, set it to 225-250°F with wood chips (applewood, cherry, or hickory work best).
👉 Pro Tip: Add a drip pan with water or apple juice under the ham to keep it moist while grilling.
Best Marinades, Rubs, and Glazes for Grilled Easter Ham
One of the best parts of grilling an Easter ham is the opportunity to add layers of rich, smoky, and sweet flavors through marinades, rubs, and glazes. A good seasoning blend enhances the meat’s natural taste, while a well-applied glaze caramelizes beautifully over the grill’s heat.
1. The Difference Between Marinades, Rubs, and Glazes
- Marinades infuse the ham with moisture and deep flavor before cooking. Best for fresh (uncooked) ham.
- Rubs are dry seasonings applied to the surface before grilling, creating a flavorful crust.
- Glazes are sweet and sticky sauces applied during the last 20-30 minutes of grilling to create a caramelized, glossy finish.
Let’s explore the best options for each!
2. Best Marinades for Grilled Ham
If using a fresh (uncured) ham or you want extra depth in a pre-cooked ham, marinating for a few hours can enhance juiciness.
Classic Apple Cider Marinade
Perfect for adding a hint of fruitiness and warmth.
Ingredients:
- 1 cup apple cider
- ¼ cup Dijon mustard
- ¼ cup honey
- 2 tablespoons soy sauce
- 1 teaspoon garlic powder
- 1 teaspoon black pepper
👉 Marinate for at least 2 hours (or up to 6 hours).
Bourbon Maple Marinade
Adds a deep, smoky-sweet flavor.
Ingredients:
- ½ cup bourbon
- ¼ cup maple syrup
- 2 tablespoons Worcestershire sauce
- 1 teaspoon smoked paprika
- 1 teaspoon onion powder
👉 Marinate for at least 2 hours for the best results.
3. Best Dry Rubs for Grilled Ham
A rub creates a flavorful crust and enhances the caramelization of the glaze. Apply the rub at least 30 minutes before grilling for better absorption.
Sweet & Smoky BBQ Rub
A perfect mix of sweetness and spice for a rich, smoky flavor.
Ingredients:
- ½ cup brown sugar
- 1 tablespoon smoked paprika
- 1 teaspoon black pepper
- 1 teaspoon garlic powder
- 1 teaspoon onion powder
- ½ teaspoon cayenne pepper
Citrus & Herb Dry Rub
Bright and fresh, perfect for springtime Easter flavors.
Ingredients:
- 1 tablespoon dried thyme
- 1 tablespoon ground mustard
- 1 teaspoon grated orange zest
- 1 teaspoon ground cloves
- ½ teaspoon salt
4. Best Glazes for Grilled Ham
A glaze gives ham its signature shiny, caramelized crust, and grilling takes it to the next level! Apply the glaze every 10-15 minutes in the last 30 minutes of grilling to avoid burning.
Classic Honey Mustard Glaze
A timeless choice that combines sweet and tangy flavors.
Ingredients:
- ½ cup honey
- ¼ cup Dijon mustard
- ¼ cup brown sugar
- 1 tablespoon apple cider vinegar
- ½ teaspoon cinnamon
👉 Brush onto the ham during the last 30 minutes of grilling.
Bourbon Brown Sugar Glaze
A deep, smoky glaze with caramelized notes.
Ingredients:
- ½ cup brown sugar
- ¼ cup bourbon
- 2 tablespoons maple syrup
- 1 teaspoon cinnamon
- ½ teaspoon nutmeg
👉 Apply in thin layers every 10 minutes until a rich, glossy crust forms.
Pineapple Ginger Glaze
For a tropical twist with bright, citrusy notes.
Ingredients:
- ½ cup pineapple juice
- ¼ cup honey
- 1 tablespoon grated ginger
- 1 tablespoon soy sauce
👉 Pairs well with fruitier marinades or rubs.
5. Pro Tips for the Perfect Glaze
Apply in Layers – Glazing too early can cause burning. Start applying in the last 20-30 minutes of grilling.
Use a Basting Brush – Helps spread the glaze evenly over the ham.
Let It Caramelize – Keep the heat at medium (325°F) to allow the sugars to develop a deep golden crust without burning.
Essential Grilling Techniques for Ham
Grilling a ham might seem intimidating, but with the right techniques, you can achieve a perfectly juicy and flavorful Easter ham with a beautifully caramelized crust. The key is controlling the heat, using indirect grilling, and applying the glaze at the right time. Let’s break it down step by step.
1. Understanding Direct vs. Indirect Grilling
Ham is a dense cut of meat, which means slow and steady cooking is the best approach.
- Direct Heat (🔥) – Food is placed directly over the flame or coals, ideal for searing meats quickly.
- Indirect Heat (🌡️) – Food is cooked away from the flame, allowing it to heat slowly and evenly, preventing burning or drying out.
👉 Best method for grilling ham: Indirect heat cooking at 300-325°F to slowly warm and infuse flavor without drying it out.
2. Setting Up Your Grill for Ham
Whether you’re using a charcoal grill, gas grill, or smoker, proper setup is crucial.
For a Charcoal Grill:
Place a drip pan with water or apple juice under the grate on the empty side.
Put the ham on the cool side of the grill (indirect heat) and cover with the lid.
Maintain 300-325°F by adjusting air vents.
For a Gas Grill:
Preheat to medium (300-325°F).
Place a drip pan beneath the ham to catch drippings.
Keep the lid closed as much as possible for even cooking.
For a Smoker:
Set smoker to 225-250°F for low and slow cooking.
Use applewood, cherry, or hickory wood chips for extra smoky flavor.
Smoke the ham for 2-3 hours, then glaze during the last 30 minutes.
3. Cooking Time & Temperature Guide
Since most hams are pre-cooked, grilling is about reheating and adding flavor, not fully cooking the meat.
| Ham Type | Temperature | Grill Time |
|---|---|---|
| Fully Cooked Bone-In Ham | 140°F internal | 12-15 minutes per pound |
| Fully Cooked Boneless Ham | 140°F internal | 10-12 minutes per pound |
| Fresh (Uncooked) Ham | 145°F internal | 20-25 minutes per pound |
👉 Use a meat thermometer to check internal temperature at the thickest part, avoiding the bone.
4. Keeping the Ham Moist While Grilling
To prevent ham from drying out on the grill:
Use a drip pan with liquid (water, apple juice, or broth) under the ham.
Tent the ham loosely with foil if it starts to darken too quickly.
Baste with glaze every 10-15 minutes in the last 30 minutes of cooking.
5. Pro Tips for Perfectly Grilled Ham
Don’t rush it – Low and slow grilling ensures juiciness.
Use a meat thermometer – This prevents overcooking.
Let the ham rest – After grilling, let it sit 10-15 minutes before slicing to retain juices.
Rotate the ham occasionally – Helps cook evenly on all sides.
Keep the grill lid closed – Reduces heat loss and maintains steady cooking temperature.
Step-by-Step Guide to Grilling Easter Ham
Now that we’ve covered the preparation and grilling techniques, it’s time to walk through the step-by-step process of grilling a delicious, smoky, and caramelized Easter ham. Whether you’re using a gas or charcoal grill, following these steps will ensure a perfectly juicy and flavorful ham.
1. Gather Your Ingredients & Tools
Before you start grilling, make sure you have everything ready:
Ham: Bone-in, pre-cooked ham (6-10 lbs)
Glaze: Honey mustard, bourbon brown sugar, or pineapple ginger
Dry Rub: Brown sugar, paprika, garlic powder, and mustard powder
Wood Chips (Optional): Applewood, cherry, or hickory
Meat Thermometer: To check internal temperature
Basting Brush: For applying glaze
Aluminum Foil: To tent if needed
Drip Pan: Filled with apple juice, water, or broth
2. Preheat Your Grill
Set up your grill for indirect heat cooking:
🔥 For a Gas Grill:
- Preheat the grill to 300-325°F.
- Turn off burners on one side for indirect heat.
- Place a drip pan beneath the cooking grate to catch juices.
🔥 For a Charcoal Grill:
- Light charcoal briquettes and arrange them on one side of the grill.
- Place a drip pan on the empty side and fill it with apple juice or water.
- Adjust vents to maintain 300-325°F.
🔥 For a Smoker:
- Set smoker temperature to 225-250°F for slow cooking.
- Add wood chips for a rich, smoky flavor.
3. Prepare the Ham
Trim Excess Fat: Leave about ¼ inch of fat for flavor.
Score the Ham: Use a knife to cut a diamond pattern on the surface.
Apply the Rub: Coat the ham evenly with your chosen dry rub.
Let It Rest: Allow the ham to sit for 30 minutes so the flavors absorb.
4. Place the Ham on the Grill
- Set the ham cut-side down on the indirect heat side of the grill.
- Close the lid and cook at 300-325°F.
- Rotate the ham every 30 minutes for even cooking.
⏳ Cooking Time Guide:
- Cook for 12-15 minutes per pound for pre-cooked ham.
- For a 10 lb ham, expect 2-2.5 hours of grilling.
5. Adding Smoke for Extra Flavor (Optional)
For a rich smoky flavor, use applewood, hickory, or cherry wood chips:
Add them to a smoker box or wrap them in foil with holes and place near the coals.
Smoke for the first hour, then let the heat finish cooking the ham.
6. Basting and Glazing the Ham
- Start basting after the first hour of cooking.
- Brush glaze onto the ham every 10-15 minutes in the last 30 minutes of grilling.
🔥 Pro Tip: If the glaze starts to burn, tent the ham with foil to prevent charring.
7. Checking for Doneness
A pre-cooked ham is done when it reaches 140°F internal temperature.
If using a fresh (uncooked) ham, cook until 145°F.
8. Resting and Slicing the Ham
- Tent with foil and let it rest for 10-15 minutes—this helps retain the juices.
9. Serve and Enjoy!
Pair your grilled Easter ham with delicious side dishes like:
🍽️ Grilled asparagus
🍽️ Scalloped potatoes
🍽️ Honey-glazed carrots
🍽️ Garlic butter rolls
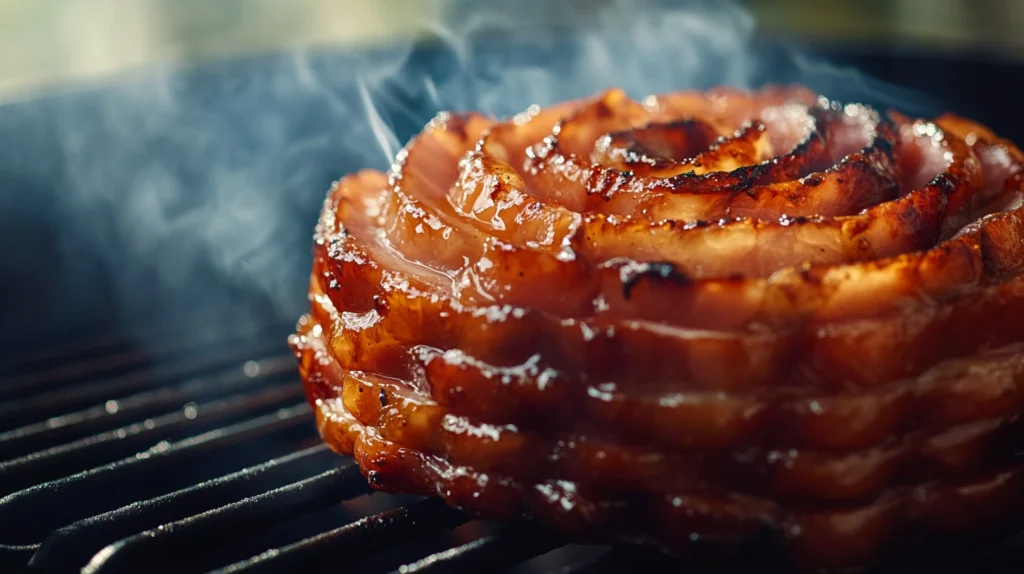
Adding Smoke for Extra Flavor
One of the best ways to elevate your grilled Easter ham is by infusing it with smoky flavors. While ham already has a rich taste, smoking adds an extra layer of depth, making it even more delicious. The key is choosing the right wood chips and using the best smoking techniques to enhance the ham without overpowering it.
1. Best Wood Chips for Grilled Ham
Different wood types provide unique flavors, and choosing the right one can complement your glaze and rub.
| Wood Type | Flavor Profile | Best Pairing |
|---|---|---|
| Applewood 🍏 | Light, slightly sweet | Honey or maple glazes |
| Cherrywood 🍒 | Mild with a hint of fruitiness | Brown sugar or bourbon glazes |
| Hickory 🌰 | Strong, smoky, slightly sweet | BBQ-style or mustard glazes |
| Pecan 🥜 | Nutty, sweet, and mild | Traditional holiday ham flavors |
| Maple 🍁 | Sweet, mild smokiness | Cinnamon or pineapple glazes |
👉 Best choice for Easter ham: Applewood or cherrywood for a balanced, sweet-smoky flavor.
2. How to Use Wood Chips for Smoking
Whether you’re using a gas, charcoal, or pellet grill, adding smoke properly will enhance the ham without overpowering it.
Using Wood Chips on a Gas Grill
1️⃣ Soak 1 cup of wood chips in water for 30 minutes.
2️⃣ Drain and place them in a smoker box or wrap them in foil with holes.
3️⃣ Place the smoker box or foil pack over the burner on the hot side of the grill.
4️⃣ Wait for the chips to start smoking, then place the ham on the indirect heat side.
5️⃣ Close the lid and let the smoke work its magic!
Using Wood Chips on a Charcoal Grill
1️⃣ Soak and drain 1-2 cups of wood chips.
2️⃣ Sprinkle them directly over hot coals or use a foil packet.
3️⃣ Add fresh wood chips every 45 minutes to maintain the smoke.
Using a Smoker
1️⃣ Preheat the smoker to 225-250°F.
2️⃣ Add applewood, cherry, or hickory chips to the smoker box.
3️⃣ Place the ham on the grate and smoke for 2-3 hours, basting with glaze in the last 30 minutes.
🔥 Pro Tip: Avoid adding too many wood chips at once, as too much smoke can make the ham bitter. A light, steady stream of smoke is best!
3. How Long Should You Smoke a Ham?
Since most Easter hams are pre-cooked, you only need to infuse smoke without overcooking.
- For a mild smoke flavor: 30-45 minutes
- For a stronger smoky taste: 1-2 hours
- For an intense, deep smoke: 2-3 hours (best for fresh ham)
👉 Always use a meat thermometer! A fully cooked ham should reach 140°F internal temperature before serving.
4. Balancing Smoke with Glaze
When grilling with smoke, the glaze plays a crucial role in balancing the flavors.
If using mild wood chips (applewood, cherry), pair them with sweet glazes like honey or pineapple.
If using stronger wood chips (hickory, pecan), pair them with bolder flavors like mustard or bourbon brown sugar.
Apply glaze in the last 30 minutes of grilling to prevent burning.
5. Can You Use a Pellet Grill for Smoked Ham?
Absolutely! A pellet grill like a Traeger is perfect for smoking Easter ham. Simply:
1️⃣ Set the pellet grill to 225-250°F.
2️⃣ Use applewood or cherrywood pellets.
3️⃣ Smoke for 2-3 hours, then glaze in the final 30 minutes.
Basting and Glazing Techniques for Maximum Flavor
Basting and glazing are essential steps in grilling an Easter ham. A well-applied glaze not only enhances flavor but also creates that beautiful caramelized crust that makes the ham shine on your holiday table.
1. When to Apply the Glaze
Timing is everything when it comes to glazing your grilled ham. If applied too early, the sugars in the glaze can burn; if applied too late, the ham won’t fully absorb the flavors.
Start basting after the first hour of grilling.
Apply glaze every 10-15 minutes in the last 30 minutes of cooking.
Keep the grill lid closed between basting to maintain heat.
🔥 Pro Tip: If the glaze begins to burn, tent the ham loosely with foil to prevent over-caramelization.
2. How to Apply the Glaze
To ensure even coverage and a perfect glaze crust, follow these techniques:
Brushing Method (Best for Thick Glazes)
- Use a silicone or pastry brush to apply the glaze evenly over the ham.
- Start with a light coat, letting it absorb before adding more.
- Apply multiple layers for a deeper caramelized crust.
Basting with a Spoon (For Thin, Syrupy Glazes)
- Drizzle the glaze over the ham using a spoon or ladle.
- Allow it to naturally drip over the scored lines for better absorption.
- Rotate the ham occasionally to cover all sides evenly.
Mop Sauce Method (For BBQ-Style Hams)
- If using a BBQ-style glaze, a basting mop or cloth works best.
- Dip the mop in the glaze and gently dab it onto the ham.
- Avoid rubbing too hard, as it can remove the seasoning crust.
🔥 Pro Tip: Keep a bit of extra glaze for serving so guests can drizzle more if desired!
3. The Best Glazes for a Perfect Caramelized Crust
Different glazes provide different textures and finishes when grilled. Here’s how they affect your ham:
| Glaze Type | Best Flavor Profile | Caramelization Level |
|---|---|---|
| Honey Mustard 🍯 | Sweet & tangy | High, forms a glossy crust |
| Brown Sugar & Bourbon 🥃 | Rich, deep caramel notes | Medium-high, slightly sticky |
| Pineapple Ginger 🍍 | Fruity & fresh | Light, mild golden color |
| BBQ Maple Glaze 🔥 | Smoky & sweet | Thick, sticky caramelization |
🔥 Pro Tip: The higher the sugar content, the darker the caramelization. Be mindful not to burn it!
4. Preventing Burnt or Uneven Glaze
To avoid burning or patchy glazing, follow these tips:
Glaze in Thin Layers: Thick coatings can drip off or burn.
Monitor Heat Levels: Keep the grill at 300-325°F for even cooking.
Use a Meat Thermometer: Overcooking dries out the ham, so remove it at 140°F for a pre-cooked ham.
Rotate the Ham: Turn it every 15 minutes while glazing to ensure even caramelization.
5. What to Do If the Glaze Starts Burning
- Move the ham to indirect heat to slow down caramelization.
- Reduce sugar content in the glaze if it burns too fast.
- Wrap the ham in foil if the crust is darkening too quickly.
- Glaze more frequently with smaller amounts to control layering.
Checking for Doneness & Resting the Ham
Now that your grilled Easter ham is beautifully glazed and caramelized, the final steps are checking for doneness and allowing it to rest before serving. These steps ensure the ham is juicy, tender, and bursting with flavor when sliced.
1. How to Check If the Ham Is Done
Most Easter hams are pre-cooked, so grilling is about reheating and adding flavor, not fully cooking the meat. However, checking the internal temperature is still crucial to avoid drying out or undercooking the ham.
Use a meat thermometer to check doneness accurately.
Once the ham reaches the correct internal temperature, it’s ready to rest and serve!
| Type of Ham | Target Internal Temperature | Grill Time (Approx.) |
|---|---|---|
| Pre-cooked ham (bone-in or boneless) | 140°F (60°C) | 12-15 minutes per pound |
| Fresh (uncooked) ham | 145°F (63°C) | 20-25 minutes per pound |
🔥 Pro Tip: If your ham is slightly below 140°F, remove it from the grill and tent with foil. The residual heat will continue to cook it while resting.
2. How to Rest the Ham for Maximum Juiciness
Just like steak, resting a ham before slicing allows the juices to redistribute throughout the meat, keeping it moist and tender.
Remove the ham from the grill and place it on a cutting board.
Tent loosely with foil to keep it warm without trapping too much steam.
Let it rest for 10-15 minutes before slicing.
🔥 Why is resting important?
- Resting allows the meat fibers to relax, resulting in tender, evenly flavored slices.
3. How to Slice Grilled Ham Like a Pro
For the best presentation and texture, follow these slicing tips:
🔪 For Bone-In Ham:
- Place the ham on its flat side for stability.
- Start at the shank end and work toward the thicker portion.
🔪 For Spiral-Cut Ham:
- Simply follow the pre-cut slices with a knife for easy serving.
🔥 Pro Tip: If the glaze has hardened, dip the knife in hot water before slicing for smoother cuts.
4. Serving Grilled Easter Ham
Your perfectly grilled ham is now ready to serve! 🍽️ Pair it with classic Easter side dishes for a complete holiday meal:
🥔 Scalloped potatoes – Creamy and rich, a perfect balance to smoky ham.
🥕 Honey-glazed carrots – Adds a touch of natural sweetness.
🥗 Grilled asparagus – Light and fresh, enhancing the smoky flavors.
🍞 Garlic butter rolls – The ultimate companion for ham slices.
🍍 Grilled pineapple rings – Complements the smoky-sweet ham beautifully.
5. Leftover Tip: Keeping Ham Juicy After Cooking
If you’re not serving the ham immediately or want to keep leftovers moist:
Store sliced ham in a sealed container with a little broth or glaze.
Reheat at a low temperature (275°F) with foil to retain moisture.
Use leftovers creatively in sandwiches, soups, or breakfast scrambles.
Slicing and Serving Grilled Easter Ham
Now that your grilled Easter ham has rested properly, it’s time to slice, serve, and impress your guests. Whether you’re presenting a bone-in ham for a show-stopping centerpiece or serving a spiral-cut ham for easy plating, this guide will ensure you get the perfect slices every time.
1. The Best Way to Slice Ham
The way you slice your ham affects its texture, juiciness, and presentation. Follow these steps to make sure every piece is flavorful and tender.
For Bone-In Ham:
1️⃣ Place the ham on a cutting board, with the cut side facing down for stability.
2️⃣ Use a sharp carving knife (or an electric knife) to make thin, even slices.
3️⃣ Start at the shank end, working toward the thicker part.
4️⃣ Cut along the bone, removing larger chunks first, then slice into portions.
5️⃣ Arrange slices on a platter, drizzling extra glaze or pan juices for added moisture.
For Spiral-Cut Ham:
1️⃣ Since the ham is already pre-sliced, use a knife to loosen the slices along the bone.
2️⃣ Gently pull apart the pieces and arrange them on a serving tray.
3️⃣ Warm up extra glaze and drizzle over the top for a glossy finish.
🔥 Pro Tip: If the ham cools down while slicing, pop it back on the grill for 5 minutes over indirect heat to warm up!
2. Serving Suggestions: What to Pair with Grilled Ham
A grilled Easter ham pairs perfectly with both classic holiday sides and fresh, seasonal dishes. Here are some of the best options to serve alongside your ham:
🍽️ Classic Easter Side Dishes:
Scalloped Potatoes – Creamy, cheesy, and the perfect contrast to smoky ham.
Deviled Eggs – A traditional Easter staple that complements the savory flavors.
Honey-Glazed Carrots – Adds a natural sweetness to balance the smoky notes.
Green Bean Casserole – A rich, comforting dish that pairs well with ham.
Garlic Butter Rolls – Soft, fluffy bread that soaks up the delicious glaze.
🥗 Lighter & Fresh Side Dishes:
Grilled Asparagus with Lemon – Adds a bright, fresh contrast to the ham.
Spring Salad with Strawberries & Nuts – A refreshing mix of greens, fruit, and crunch.
Roasted Brussels Sprouts with Balsamic Glaze – A tangy, smoky side that pairs beautifully.
🍍 Sweet & Fruity Complements:
Grilled Pineapple Rings – The perfect smoky-sweet pairing for ham.
Cranberry Orange Relish – A zesty, slightly tart contrast to balance the flavors.
Baked Apples with Cinnamon – A warm, spiced dessert that enhances the caramelized ham glaze.
🔥 Pro Tip: Serve the ham with extra glaze on the side so guests can drizzle more over their slices!
3. Presentation Tips for a Beautiful Easter Table
Your grilled Easter ham is the centerpiece of the meal, so make it look as amazing as it tastes!
🎀 Use a Large Platter: Arrange the ham slices neatly, slightly overlapping for an elegant look.
🍍 Add Garnishes: Decorate with fresh pineapple slices, orange wedges, rosemary sprigs, or edible flowers.
🥄 Serve with Extra Sauce: A small bowl of warm glaze or pan juices lets guests add more flavor.
📸 Capture the Moment: A beautifully presented ham makes for the perfect Easter feast photo!
4. Storing Leftover Ham
If you have leftover ham (which you probably will!), here’s how to keep it moist and flavorful for later meals.
Freeze: Wrap slices in foil, place in a freezer bag, and store for up to 3 months.
Reheat Gently: Warm in a 275°F oven, covered with foil for 15 minutes to prevent drying out.
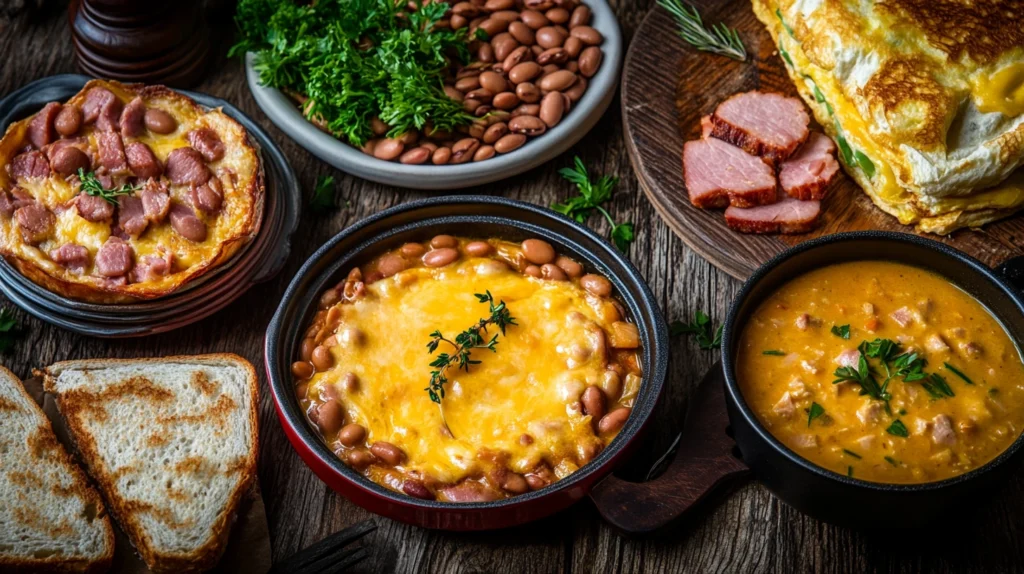
Leftover Ideas – How to Use Grilled Ham After Easter
Leftover Grilled Easter Ham is a gift that keeps on giving! Instead of just reheating slices, you can transform Grilled Easter Ham into delicious meals for breakfast, lunch, and dinner. From savory breakfast scrambles with Grilled Easter Ham to hearty soups and sandwiches, there are endless ways to enjoy every last bite. Whether you’re making a ham and cheese omelet, a classic ham and bean soup, or a toasted Grilled Easter Ham sandwich, these creative ideas will make your leftovers just as exciting as the main meal.
1. Breakfast Ideas with Leftover Ham
🥚 Ham and Cheese Omelet
- Dice leftover ham and fold it into eggs with cheddar or Swiss cheese for a quick, protein-packed breakfast.
- Add fresh spinach, bell peppers, or mushrooms for extra flavor.
🥔 Ham & Potato Hash
- Sauté chopped ham with diced potatoes, onions, and bell peppers until crispy.
- Serve with a fried or poached egg on top for the ultimate comfort breakfast.
🧀 Ham & Cheese Breakfast Casserole
- Layer cubed ham, bread cubes, eggs, milk, and shredded cheese in a baking dish.
- Bake at 375°F for 30-40 minutes until golden brown.
🔥 Pro Tip: Make a ham, egg, and cheese biscuit sandwich for an easy grab-and-go breakfast!
2. Lunch Ideas with Leftover Ham
🥪 Grilled Ham & Cheese Sandwich
- Butter the bread, layer ham and Swiss cheese, and grill until golden brown.
- Add Dijon mustard or honey mustard for extra zing!
🥗 Ham & Pineapple Salad
- Toss chopped ham with fresh greens, cherry tomatoes, pineapple, nuts, and feta cheese.
- Drizzle with a honey-mustard vinaigrette for a sweet and savory combo.
🥖 Ham & Swiss Sliders
- Layer ham and Swiss cheese on Hawaiian rolls, brush with garlic butter, and bake until warm.
- Perfect for easy Easter leftovers or party snacks!
🔥 Pro Tip: Try a croque monsieur (French ham & cheese sandwich) with béchamel sauce for a gourmet twist.
3. Dinner Ideas with Leftover Ham
🍝 Creamy Ham & Pea Pasta
- Cook pasta and toss it with ham, peas, garlic, and a creamy Parmesan sauce.
- A quick and easy 30-minute weeknight meal!
🥣 Ham & Bean Soup
- Simmer diced ham with white beans, carrots, celery, onions, and broth for a hearty soup.
- Perfect for freezing and enjoying later.
🥔 Cheesy Ham & Potato Casserole
- Layer sliced potatoes, ham, and cheese, then bake in a creamy sauce.
- Comfort food at its best!
🔥 Pro Tip: Make a ham and broccoli quiche for a delicious dinner or brunch dish!
4. Snack & Appetizer Ideas
🧀 Ham & Cheese Pinwheels
- Roll ham, cream cheese, and spinach in a tortilla, slice into bite-sized pieces, and serve chilled.
🥓 Ham-Wrapped Asparagus
- Wrap grilled asparagus with thin ham slices, bake for 10 minutes, and drizzle with balsamic glaze.
🔥 Pro Tip: Make a ham and cheese dip by mixing chopped ham with cream cheese, sour cream, and cheddar—serve warm with crackers!
5. Freezing & Storing Leftover Ham
How long does ham last in the fridge?
- 4-5 days in an airtight container.
Can you freeze leftover ham?
- Yes! Wrap slices in foil, place in a freezer bag, and store for up to 3 months.
Best way to reheat ham without drying it out?
- Warm in a 275°F oven, covered with foil for 15 minutes, or heat individual slices in a pan over low heat.
🔥 Pro Tip: Freeze cubed ham in portioned bags for easy use in soups, omelets, or casseroles later!
Pair your Grilled Easter Ham with a comforting bowl of Lemon Chicken Orzo Soup for a well-balanced meal, then finish off with a deliciously sweet Carrot Cake Trifle. If you’re hosting a larger gathering, serve alongside some crowd-pleasing Easy and Cheesy Pizza Sliders for a mix of flavors that will keep everyone coming back for more!
Frequently Asked Questions
Can I cook a ham on the grill?
Yes, you can cook a ham on the grill, and it adds a delicious smoky flavor. Use indirect heat by placing the ham on the unlit side of the grill and keeping the burners or charcoal on the opposite side. Maintain a temperature of about 250–300°F (120–150°C) and cook until the ham reaches an internal temperature of 140°F (60°C). You can also add a glaze during the last 30 minutes for extra flavor.
Can you cook a spiral ham on a gas grill?
Yes, a spiral ham can be cooked on a gas grill using indirect heat. Preheat the grill to 250–275°F (120–135°C) and place the ham in a foil pan with a bit of liquid (like apple juice or water) to keep it moist. Cover the ham loosely with foil and cook for about 12–15 minutes per pound, basting occasionally. Remove the foil in the last 15–20 minutes to allow the glaze to caramelize.
What kind of ham is best for Easter?
The best ham for Easter depends on preference, but spiral-cut hams, honey-glazed hams, and smoked hams are the most popular. Bone-in hams tend to be juicier and more flavorful, while boneless hams are easier to carve. If you want a classic taste, a honey-baked or maple-glazed ham is a great choice.
How long to heat a 10 lb precooked spiral ham?
To heat a 10 lb precooked spiral ham, set your oven to 250°F (120°C). Place the ham in a roasting pan with about 1/2 cup of water, cover it with foil, and heat for 12–15 minutes per pound. This means a 10 lb ham will take approximately 2–2.5 hours. If adding a glaze, apply it during the last 20–30 minutes and remove the foil to allow caramelization. Ensure the internal temperature reaches 140°F (60°C) before serving.
Conclusion
Cooking a ham, whether on the grill, in the oven, or for a special occasion like Easter, is a simple yet rewarding process. Grilling a ham adds a smoky depth of flavor, and using a gas grill for a spiral ham ensures a juicy, caramelized finish. When selecting a ham for Easter, bone-in and spiral-cut hams are popular choices, with honey-glazed or smoked varieties offering rich taste and tenderness.
For reheating a precooked ham, following the correct temperature and timing is key to keeping it moist and flavorful. Whether you choose to grill, bake, or slow-cook your ham, adding a delicious glaze and properly heating it to 140°F (60°C) will ensure a mouthwatering meal.
With the right techniques and a bit of patience, you can serve a perfectly cooked ham that will impress your family and guests. Enjoy your meal! 🍽️
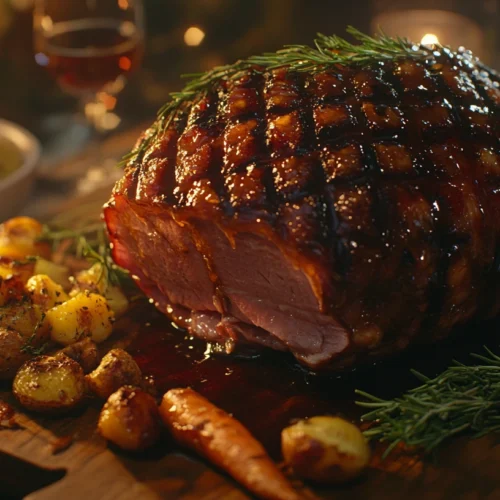
Grilled Easter Ham – Juicy, Smoky & Flavorful Holiday Ham
Equipment
- Gas or charcoal grill (with a lid)
- Aluminum foil
- Meat thermometer
- Basting brush
- Sharp knife
- Cutting board
- Roasting pan or disposable foil pan
Ingredients
- For the Ham:
- 1 8–10 lb fully cooked bone-in spiral ham
- 1 cup apple juice or pineapple juice
- 1 cup water
- For the Glaze:
- 1/2 cup honey
- 1/2 cup brown sugar
- 1/4 cup Dijon mustard
- 2 tbsp apple cider vinegar
- 1 tbsp Worcestershire sauce
- 1 tsp ground cinnamon
- 1/2 tsp ground cloves
- 1/2 tsp black pepper
Instructions
- Step 1: Prepare the Grill
- Preheat your gas or charcoal grill to 250–275°F (120–135°C) using indirect heat.
- If using charcoal, place the coals on one side and leave the other side empty. If using a gas grill, turn on only one side of the burners.
- Step 2: Prepare the Ham
- Remove the ham from packaging and pat it dry with paper towels.
- Place the ham in a roasting pan or disposable foil pan with 1 cup of apple juice and 1 cup of water to keep it moist.
- Cover the ham loosely with aluminum foil.
- Step 3: Grill the Ham
- Place the ham cut-side down on the indirect heat side of the grill.
- Close the lid and grill for 12–15 minutes per pound (about 2–2.5 hours for a 10 lb ham), basting occasionally.
- Step 4: Prepare the Glaze
- While the ham is grilling, combine all glaze ingredients in a saucepan over medium heat.
- Stir until the sugar dissolves and the glaze thickens slightly (about 5 minutes), then remove from heat.
- Step 5: Glaze and Finish the Ham
- About 30 minutes before the ham is done, remove the foil and brush the glaze generously over the ham.
- Continue grilling uncovered, basting every 10 minutes, until the ham reaches an internal temperature of 140°F (60°C).
- Step 6: Rest and Serve
- Remove the ham from the grill and let it rest for 10–15 minutes before slicing.
- Serve warm and enjoy!
Notes
For a crispy glaze, increase the grill heat to 400°F (200°C) for the last 5 minutes.
Leftovers can be stored in an airtight container in the fridge for up to 5 days.