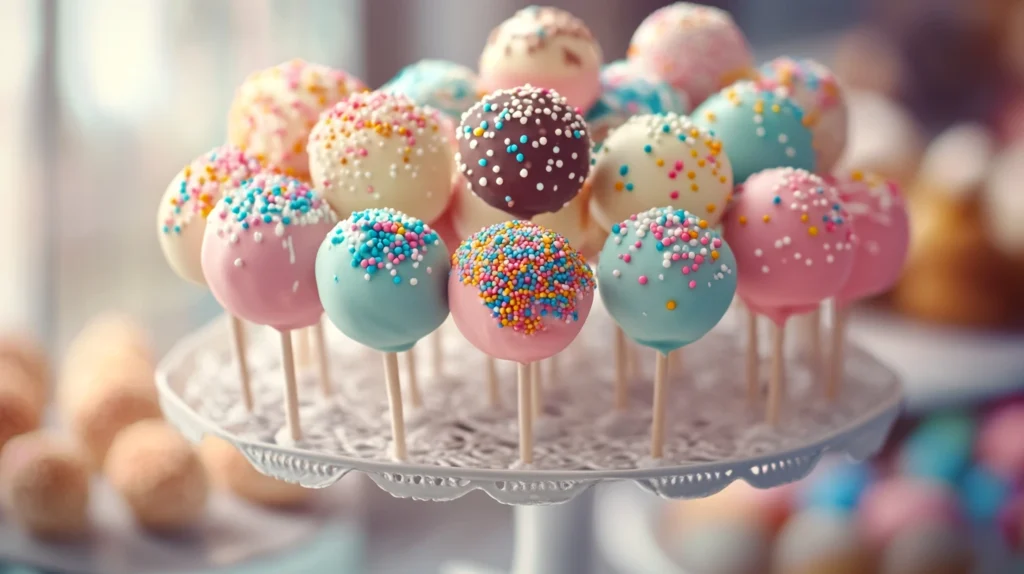
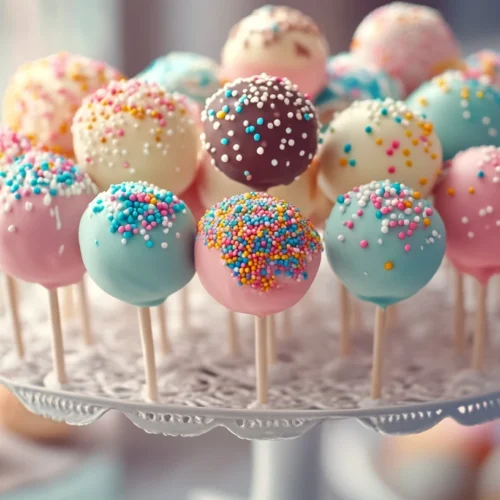
Irresistible Cake Pops are the perfect bite-sized treats that combine the best of cake and candy in one delightful dessert. With their moist cake centers coated in a smooth chocolate shell and served on a stick, these colorful confections are as fun to make as they are to eat. Whether you’re planning a birthday party, a baby shower, a holiday gathering, or just craving something sweet, cake pops deliver a delicious experience that’s easy to customize for any occasion.
What makes these cake pops truly irresistible is the endless variety of flavors, decorations, and designs you can create. From classic vanilla and chocolate to red velvet and cookies & cream, every bite brings a burst of flavor wrapped in a perfectly portable form. In this guide, we’ll walk you through everything you need to know about making irresistible cake pops at home—from choosing the right cake base and binding techniques to expert dipping tips and fun decorating ideas.
Ready to impress your friends, family, or party guests? Let’s dive into the wonderful world of cake pops and make your next dessert table truly unforgettable.
The Allure of Cake Pops
What Are Cake Pops?
Cake pops are exactly what they sound like—cake on a stick. They’re made by crumbling baked cake, mixing it with frosting to form a dough-like consistency, rolling it into balls (or creative shapes), inserting a stick, and then dipping it in a delicious coating like chocolate or candy melts. Think of them as the perfect bite of cake with a twist—portable, shareable, and totally customizable.
Originally made famous by home bakers and food bloggers, cake pops quickly found their way into major coffee shops, bakeries, and event catering menus. Their charming appearance and convenient size make them a hit with both kids and adults alike.
Cake pops are in the same category of clever dessert innovation as the Irresistible Cinnamon Sugar Cruffins, offering that same “wow” moment in every bite.
Why Everyone Loves Them
So what makes cake pops truly irresistible? First, there’s the variety of flavors—from classic vanilla and chocolate to red velvet, lemon, or cookies and cream. Then there’s the fun factor: they’re easy to decorate in dozens of themes and colors, making them ideal for every occasion from baby showers to Halloween parties.
But beyond aesthetics, it’s the texture and taste that win hearts. That soft, rich center meets a snappy coating in every bite—delivering a satisfying mix of flavors and mouthfeel that you just don’t get with traditional cake slices.
Another big reason they’ve grown in popularity is portion control. Because they’re small, cake pops offer the sweetness people crave without the guilt of a full slice of cake. Plus, their no-fork-needed format makes them perfect for events, party favors, or gifts.
Just like the layered indulgence of Strawberries & Cream Delight, cake pops are a visual and flavorful treat that always impresses.
Ingredients for Irresistible Cake Pops
Creating the ultimate cake pop starts with using quality ingredients. While the concept is simple, your choices here make all the difference in flavor, texture, and how well your pops hold together.
Choosing the Right Cake Base
The base is the foundation of your cake pop. Any cake flavor will do, but moist cakes like chocolate, red velvet, carrot, or funfetti tend to hold together better and offer deeper flavors.
Here are some tips:
- Homemade cake works great because you control the moisture and sweetness.
- Boxed cake mixes are perfectly fine—just avoid overbaking so it stays moist.
- Day-old cake? Even better! It crumbles easier, which helps with shaping.
You can also use cake scraps from other baking projects to minimize waste and get creative with combinations.
Best Frostings and Flavors to Mix In
After crumbling the cake, you’ll mix in frosting to create a dough-like texture. The frosting adds moisture, richness, and helps bind the cake crumbs together. But too much frosting makes cake pops too mushy—so moderation is key.
Popular frosting options include:
- Cream cheese frosting – perfect with red velvet or carrot cake
- Chocolate ganache – rich and decadent
- Buttercream – customizable with different extracts or flavorings
- Nut butters – for protein-packed, allergy-friendly options
Want to take it further? Add extracts like vanilla, almond, peppermint, or lemon zest to boost flavor, or even mix in cookie crumbs, crushed candies, or spices for a fun twist.
Quality Chocolate and Toppings
The final layer—the coating—gives your cake pop that crisp outer shell and visual appeal. Using high-quality chocolate or candy melts ensures a smooth, glossy finish and enhances the overall taste.
Choose from:
- Milk, white, or dark chocolate chips
- Candy melts in a rainbow of colors
- Compound chocolate for easier melting and coating
Pro tip: Always temper real chocolate if you want a professional shine. Candy melts are easier for beginners and come in every color imaginable.
For toppings, the sky’s the limit! Consider:
- Sprinkles
- Drizzled chocolate
- Crushed nuts or cookies
- Coconut flakes
- Edible glitter or gold dust
These little extras not only add texture and color but give your cake pops that extra flair that makes them irresistible.
Tools and Equipment You’ll Need
Creating irresistible cake pops doesn’t require a full bakery setup, but having the right tools can make the process smoother, cleaner, and more professional-looking.
Cake Pop Makers vs. DIY Method
There are two main approaches to making cake pops: using a cake pop maker or going the traditional DIY route.
- Cake Pop Maker: This electric tool bakes cake batter into perfectly round balls without the need for crumbling and mixing with frosting. It’s quick and clean, ideal if you want a lighter texture or are making large batches.
- DIY Method: The classic way involves baking a regular cake, crumbling it, mixing with frosting, shaping into balls, and chilling before dipping. This gives you a denser, fudgier texture, which many find more satisfying.
Both methods have their fans. Choose based on your preference for taste, texture, and convenience.
Decorating Tools and Essentials
Here’s a list of must-have tools for creating irresistible cake pops:
- Mixing bowls: For crumbling and combining cake with frosting.
- Cookie scoop or melon baller: Helps you shape uniform cake balls.
- Lollipop sticks: These come in various sizes and can be found at craft or baking stores.
- Styrofoam block or cake pop stand: To hold pops upright while they dry.
- Double boiler or microwave-safe bowls: For melting chocolate or candy melts.
- Parchment paper: For setting coated pops if not using a stand.
- Decorating bags or squeeze bottles: Useful for drizzling chocolate or adding intricate designs.
- Edible decorations: Sprinkles, glitter, candy eyes, fondant pieces, and more.
Optional but helpful:
- Thermometer: If tempering chocolate.
- Freezer or fridge space: Chilling is essential to maintain shape and avoid melting during dipping.
Investing in a few of these tools will make your cake pop journey easier and more enjoyable.
Step-by-Step Guide to Making Irresistible Cake Pops
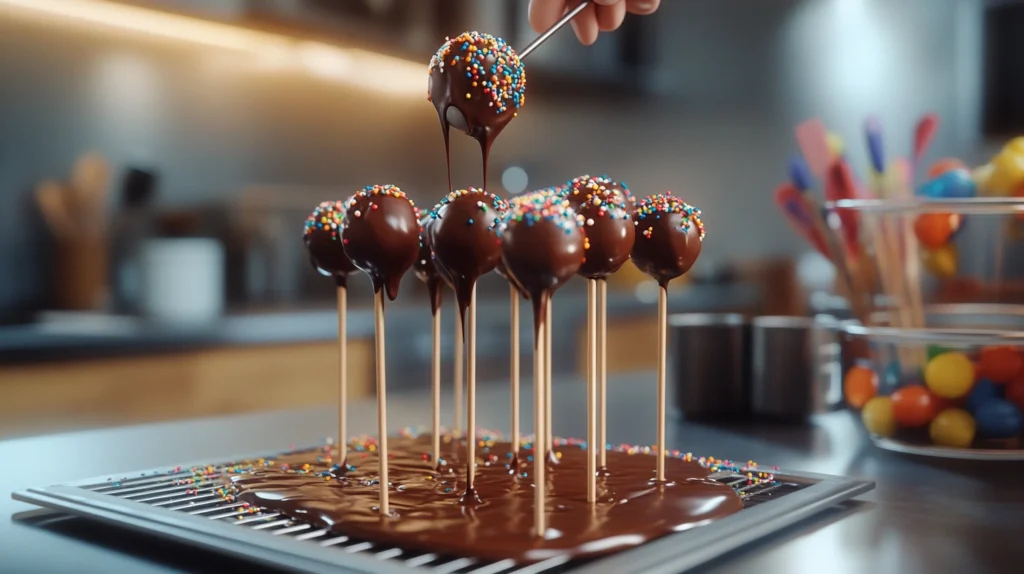
Ready to create your own batch of adorable, mouthwatering cake pops? Follow these steps and you’ll be rolling out treats that look as amazing as they taste.
Baking and Crumbling the Cake
- Bake your cake using your preferred recipe or boxed mix.
- Let the cake cool completely—warm cake will melt frosting and ruin consistency.
- Break the cake into pieces, then crumble it with your hands or a food processor into fine, uniform crumbs.
Tips:
- Avoid large chunks—they make shaping harder.
- Use gloves for less mess and better grip.
Mixing, Shaping, and Chilling
- Add frosting a spoonful at a time, mixing until the crumbs hold together like dough. Don’t overdo it—too wet, and they’ll fall off the stick.
- Scoop and roll into balls about 1 inch in diameter. Try not to make them too big or heavy.
- Place the rolled balls on a tray lined with parchment paper.
- Chill for at least 1 hour in the refrigerator or 20–30 minutes in the freezer. This firms them up for dipping.
Pro tip: Insert your stick after chilling, but dip the tip in melted chocolate first—this acts like glue and helps the pop stay on the stick.
Dipping and Decorating Like a Pro
- Melt chocolate or candy melts in a deep cup or bowl, stirring until smooth. Use a microwave in short bursts or a double boiler.
- Dip each chilled pop straight into the coating, then lift and gently tap off excess chocolate while rotating for even coverage.
- While still wet, add sprinkles or decorations, or set them aside to drizzle later.
Tips for flawless finish:
- If coating cracks, your cake was too cold or your chocolate too hot.
- If the pop falls off the stick, it may be too heavy or under-chilled.
- Stand each dipped pop upright in a styrofoam block or pop stand to dry. Let them set completely before packaging or serving.
And there you have it—perfectly made, hand-crafted irresistible cake pops that are sure to impress!
Common Mistakes and How to Avoid Them
Even though cake pops are relatively simple to make, a few small missteps can lead to big frustrations. Here’s a rundown of the most common cake pop problems—and how to fix them for flawless results every time.
Cracks, Falls, and Melting Issues
Problem 1: Cake pops cracking after dipping.
This usually happens when the cake balls are too cold, and the chocolate coating is too hot. The temperature difference causes the coating to expand and crack.
Solution: Let your chilled cake balls sit at room temperature for 5–10 minutes before dipping. Also, let your melted chocolate cool slightly so it’s warm, not hot.
Problem 2: Cake pops falling off the stick.
A classic beginner issue! If your pops fall apart during dipping, it could be one of three things: too much frosting, not chilling long enough, or skipping the “chocolate glue” trick.
Solution: Use just enough frosting for binding, not soaking. Always chill thoroughly, and dip the stick tip in melted chocolate before inserting into the cake ball. Let it set before dipping.
Problem 3: Chocolate not sticking or too thick.
If your chocolate is lumpy, streaky, or won’t coat evenly, it may be too thick—or you may be overmixing it.
Solution: Use a little vegetable shortening or coconut oil to thin melted chocolate. Stir gently to avoid air bubbles. Candy melts are often easier to work with than real chocolate for beginners.
Texture and Flavor Pitfalls
Over-mixed dough: If you add too much frosting or overwork the mixture, you’ll end up with mushy, greasy cake pops.
Fix: Add frosting a spoonful at a time and stop when the mixture sticks together like Play-Doh.
Dry or crumbly cake pops: Usually caused by overbaked cake or not enough frosting.
Fix: Use moist cake recipes and make sure to balance your frosting-to-crumb ratio.
Too sweet or bland: Some combinations can overwhelm or underwhelm your tastebuds.
Fix: Taste your mixture before shaping. Add a pinch of salt or a splash of flavor extract to balance things out.
Creative Cake Pop Ideas for Every Occasion
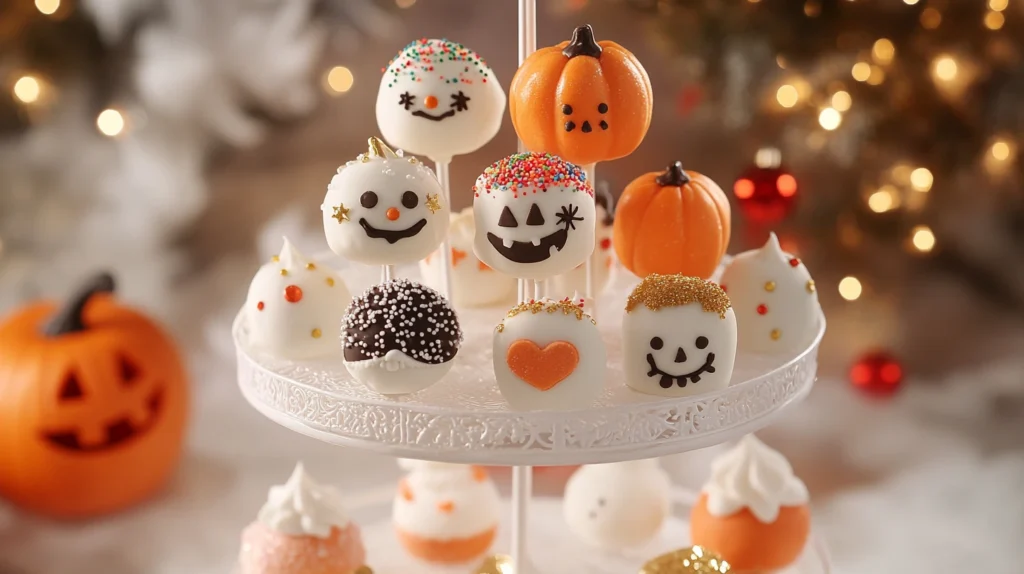
Cake pops are the ultimate blank canvas for creativity. Whether you’re making them for a birthday, baby shower, or a seasonal event, the possibilities are endless. Here are some popular and easy-to-execute themes to make your cake pops truly irresistible.
Birthday Party Cake Pops
Birthday pops are all about bright colors, fun shapes, and personalized designs. Try:
- Rainbow confetti cake pops dipped in white chocolate and topped with rainbow sprinkles.
- Pops shaped like animals, cartoon characters, or emojis using fondant and candy eyes.
- Monogrammed cake pops with the birthday person’s initials in edible paint or chocolate drizzle.
Don’t forget themed packaging—clear bags tied with ribbons in party colors make perfect party favors.
Holiday-Themed Cake Pops
Halloween:
Make spooky pops shaped like pumpkins, ghosts, or eyeballs using orange and white candy melts.
Christmas:
Decorate with red, green, and white. Make reindeer, snowmen, or ornament cake pops using fondant and colored chocolate.
Easter:
Pastel-colored pops with speckled candy coatings or bunny shapes are always a hit.
Valentine’s Day:
Heart-shaped cake pops dipped in pink or red chocolate, finished with edible glitter or sugar pearls.
These are great for gifting or displaying as a centerpiece during festive gatherings.
Elegant Wedding Cake Pops
Yes, cake pops can be fancy! Elegant designs make them ideal for weddings, bridal showers, or engagement parties.
- Dip in white or ivory chocolate and decorate with gold leaf, edible pearls, or lace-inspired piping.
- Use monograms or initials for a personal touch.
- Serve them on a tiered stand for a sophisticated presentation.
Bonus: They’re easier to serve than traditional wedding cake and much neater for guests!
Healthy and Allergy-Friendly Cake Pops
You don’t have to give up on cake pops if you’re watching your diet or have food restrictions. With a few simple swaps, cake pops can be made healthier and suitable for a variety of dietary needs—without sacrificing taste.
Gluten-Free and Vegan Options
Gluten-Free Cake Pops:
Use a gluten-free cake mix or make your own using gluten-free flour blends like almond flour, oat flour, or rice flour. Always double-check your frosting and chocolate coating to ensure they’re certified gluten-free.
Vegan Cake Pops:
Swap eggs and dairy for plant-based alternatives:
- Use flax eggs (1 tbsp flaxseed meal + 2.5 tbsp water) or applesauce for binding.
- Choose dairy-free butter and vegan cream cheese for frosting.
- Opt for vegan chocolate and sprinkles (many traditional ones contain gelatin or confectioner’s glaze).
You can even use mashed bananas or sweet potatoes for natural sweetness and texture!
These pops are not only safe for restricted diets—they’re still incredibly moist and delicious. You might even fool your non-vegan friends!
Reduced Sugar and Organic Recipes
For a more wholesome version of cake pops:
- Use unsweetened applesauce or mashed fruit to cut down on added sugar.
- Choose organic or non-GMO cake mixes and natural food coloring.
- Swap frosting for nut butter, Greek yogurt, or low-sugar whipped cream for a healthier binder.
- Decorate with crushed nuts, shredded coconut, or dark chocolate drizzle instead of sugary sprinkles.
These healthier alternatives are perfect for school snacks, health-conscious gatherings, or anyone who wants to indulge without the sugar crash.
Storing and Serving Your Cake Pops
Once your cake pops are dipped and decorated, keeping them fresh and pretty is just as important as making them. Let’s go over some pro tips to store and present them like a boss.
How to Keep Them Fresh Longer
Room Temperature:
Cake pops can be stored at room temp for up to 1 week in an airtight container. This is perfect for short-term events or gifting.
Refrigerator:
Store them for up to 2 weeks in the fridge. Wrap them individually in plastic or place them in a sealed container to prevent drying out.
Freezer:
Cake pops freeze well for up to 2 months. Just wrap them tightly in plastic wrap and place them in a freezer bag. When you’re ready to enjoy, thaw in the fridge overnight—never at room temp to avoid condensation ruining the coating.
Tip: Always let chocolate coating fully set before wrapping or stacking to avoid smudging.
Perfect Presentation and Gift Wrapping Ideas
Presentation takes your cake pops from good to unforgettable. Whether you’re setting up a dessert table or giving them as gifts, a little effort goes a long way.
For Events:
- Use cake pop stands, tiered trays, or mini vases with colored rice or beads to hold the pops upright.
- Coordinate colors with your event’s theme for a cohesive look.
- Add tiny signs or name tags for personalization.
For Gifting:
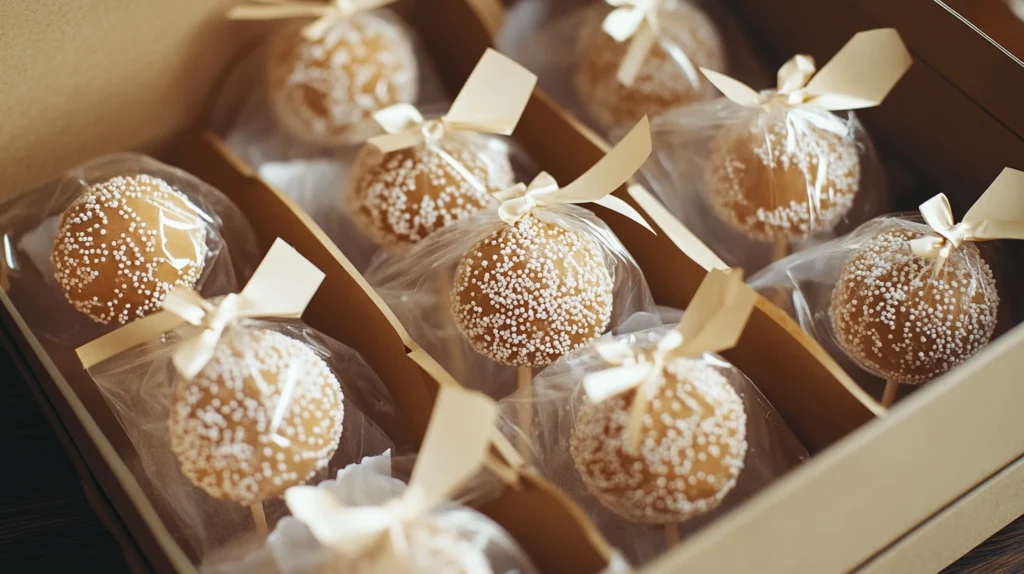
- Wrap each cake pop in a clear treat bag, secure with ribbon or twine, and add a custom tag.
- Box them in a decorative gift box lined with parchment paper or cupcake liners.
- Include a handwritten note or care instructions for extra charm.
This attention to detail makes your cake pops truly irresistible and memorable.
Use clear bags, decorative ribbons, and themed boxes for gift-worthy presentation—like how you might wrap homemade Lavender White Chocolate Truffles.
Business Potential: Selling Cake Pops for Profit
Love baking? Got a creative streak? Turning your cake pop hobby into a small business might be your next best move.
Pricing, Packaging, and Promotion Tips
Pricing:
Start by calculating your costs (ingredients, packaging, time) and add a profit margin. Typical cake pops sell for $2 to $5 each, depending on complexity.
- Offer bulk pricing or themed sets for holidays and parties.
- Factor in custom designs, delivery, and special packaging.
Packaging:
Use professional-looking packaging to boost perceived value. Clear boxes, bakery boxes with logo stickers, and high-quality wrapping help justify higher prices.
Promotion:
- Share your work on Instagram, TikTok, or Pinterest.
- Partner with local businesses like coffee shops or event planners.
- Offer samples at farmer’s markets or community events.
Word-of-mouth and beautiful visuals are your best marketing tools—so make every pop picture-worthy!
Selling Online or Locally
Depending on your location and food laws, you can either sell from home under cottage food laws or apply for a food license and sell commercially.
- Local options: Farmer’s markets, local fairs, school events, bake sales, or pop-up booths.
- Online options: Facebook Marketplace, Etsy (where allowed), or your own website.
Make sure to check local health regulations for selling homemade food, and always list allergens clearly.
With great taste, cute design, and smart marketing, cake pops can go from a fun project to a full-blown side hustle or even a career!
Frequently Asked Questions
What is the trick to cake pops?
The real trick to making perfect cake pops lies in balance and temperature control. You need just enough frosting to bind the cake crumbs—too much will make them soggy, and too little won’t hold them together. The cake balls must be well-chilled before dipping to avoid falling apart or slipping off the stick.
Another essential trick: dip the tip of the stick in melted chocolate before inserting it into the cake ball—this helps anchor it in place. And lastly, make sure your melted coating is smooth, slightly cooled, and deep enough to coat in one dip without swirling too much. These little secrets lead to flawless, bakery-worthy results every time.
Why do Starbucks cake pops taste so good?
Starbucks cake pops are known for their ultra-moist texture, consistent flavor, and indulgent frosting-to-cake ratio. They often use rich frosting and fine cake crumbs, resulting in a dense, fudgy bite that’s incredibly satisfying.
Plus, the coating is usually high-quality, sweet, and smooth, creating a satisfying shell that contrasts the soft interior. The visual appeal and branding also play a role—eye-catching designs and fun seasonal flavors make them even more irresistible to customers.
Where do Starbucks get their cake pops?
Starbucks cake pops are supplied by a company called SROriginals (now known as Steven Charles – A Dessert Company). They’re a commercial dessert supplier based in Colorado that specializes in high-end, ready-made treats.
These cake pops are mass-produced but follow a very consistent recipe and are delivered frozen to Starbucks stores, where they are thawed and served. This method allows Starbucks to maintain quality and consistency across all their locations.
How far in advance can you do cake pops?
You can make cake pops up to 7 days in advance if storing them in the fridge, and up to 2 months in advance if freezing them. If you’re prepping for an event, here’s a helpful timeline:
- 5–7 days ahead: Make, dip, decorate, and refrigerate.
- Up to 2 months ahead: Freeze fully finished cake pops in airtight containers.
- 1 day ahead: Assemble displays or package for gifting.
Just be sure to store them in airtight containers and keep them cool. If frozen, let them thaw in the fridge overnight before serving. Avoid letting them warm too quickly, or the coating could sweat or crack.
Conclusion
Irresistible Cake Pops are more than just trendy treats—they’re a creative and satisfying way to transform ordinary cake into extraordinary desserts. With their compact size, playful presentation, and endless decorating possibilities, cake pops are the go-to choice for adding sweetness and style to any celebration.
Whether you’re making them for the first time or perfecting your technique, the joy of baking—and sharing—these little delights never gets old. From birthdays and holidays to weddings and casual gatherings, cake pops always bring smiles and compliments.
Now that you’ve learned the basics, explored flavor combinations, and picked up pro tips for presentation, it’s time to roll up your sleeves and start creating your own batch of irresistible cake pops. Trust us—once you make them, you’ll always want a few in the fridge, ready for any sweet moment.
🍭 Irresistible Cake Pops
Equipment
- Mixing bowls (2 large)
- Baking tray or sheet pan
- Parchment paper
- Cookie scoop or melon baller
- Microwave-safe bowl or double boiler
- Lollipop sticks
- Styrofoam block or cake pop stand
- Spatula or wooden spoon
- Optional: decorating bags, squeeze bottles, food-safe gloves
Ingredients
- For the Cake Balls:
- 1 box of cake mix any flavor, e.g., chocolate, vanilla, red velvet
- Ingredients listed on cake mix box usually eggs, oil, water
- For the Frosting:
- 1/2 cup 120g frosting (buttercream, cream cheese, or store-bought)
- For the Coating & Decoration:
- 12 oz 340g chocolate chips or candy melts (white, milk, or dark)
- 1 –2 tsp vegetable shortening or coconut oil to thin coating, optional
- Sprinkles crushed cookies, edible glitter, or toppings of choice
Instructions
- Bake the Cake:
- Prepare cake according to the package instructions. Let it cool completely.
- Crumble the Cake:
- Break the cake into fine crumbs in a large bowl using your hands or a fork.
- Mix with Frosting:
- Add frosting one spoon at a time and mix until the crumbs stick together like dough. The texture should be moldable—not too wet or dry.
- Shape the Pops:
- Scoop and roll the mixture into 1-inch balls. Place on a parchment-lined tray.
- Chill:
- Refrigerate for at least 1 hour or freeze for 30 minutes.
- Insert Sticks:
- Dip the tip of each lollipop stick in melted chocolate, then insert halfway into each cake ball. Let them set.
- Melt Coating:
- Melt candy melts or chocolate with a small amount of shortening (if needed) until smooth.
- Dip & Decorate:
- Dip each pop into the melted coating, gently tap off the excess, then decorate with sprinkles or toppings immediately.
- Dry & Serve:
- Stick pops upright into a Styrofoam block or stand. Let them dry completely before serving or packaging.

