Italian Ciabatta is more than just bread—it’s a rustic masterpiece born from centuries of Italian baking tradition. Known for its crisp crust, chewy texture, and signature open crumb, ciabatta has carved a unique place in the world of artisanal loaves. Whether you’re dipping it in golden olive oil, using it to build a panini, or simply enjoying it fresh from the oven, ciabatta offers an experience that’s as comforting as it is flavorful.
In this article, we’ll take a deep dive into the world of Italian Ciabatta. From its humble beginnings in Northern Italy to its status as a staple in international bakeries, you’ll learn about its ingredients, baking techniques, cultural significance, and even how to make your own ciabatta at home. We’ll also answer some of the most common questions and share expert tips that will elevate your bread game.
Whether you’re a seasoned home baker or a curious foodie, this guide is crafted just for you.
The Legacy of Italian Baking
Bread has always held a sacred place in Italian culinary culture. For centuries, it’s been a symbol of sustenance, family, and tradition. From focaccia in Liguria to pane toscano in Tuscany, each region of Italy boasts its own style of bread that reflects its local ingredients and way of life.
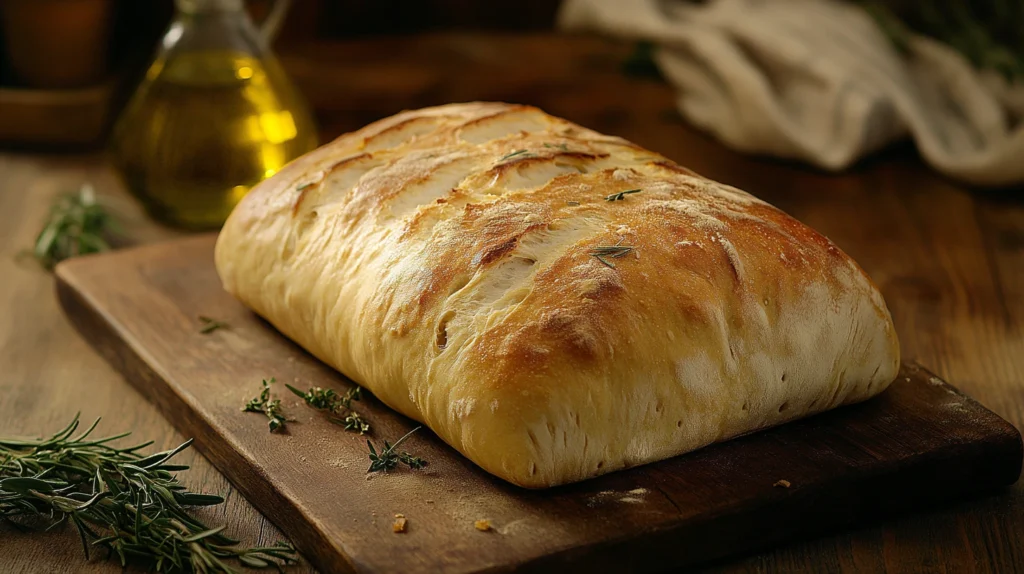
Ciabatta is one such regional gem that gained national and eventually global recognition. Developed relatively recently compared to other historic Italian breads, ciabatta has quickly earned a reputation for its characteristically soft, airy interior and crunchy crust. What sets it apart is not just how it looks, but the experience it delivers—light yet hearty, simple yet packed with flavor.
The name “ciabatta” translates to “slipper” in Italian, a nod to its flat, elongated shape that resembles the comfortable house footwear. It’s a humble bread with an elegant touch, and its origin story is a fascinating tale of innovation in response to changing times.
What Makes Ciabatta Unique?
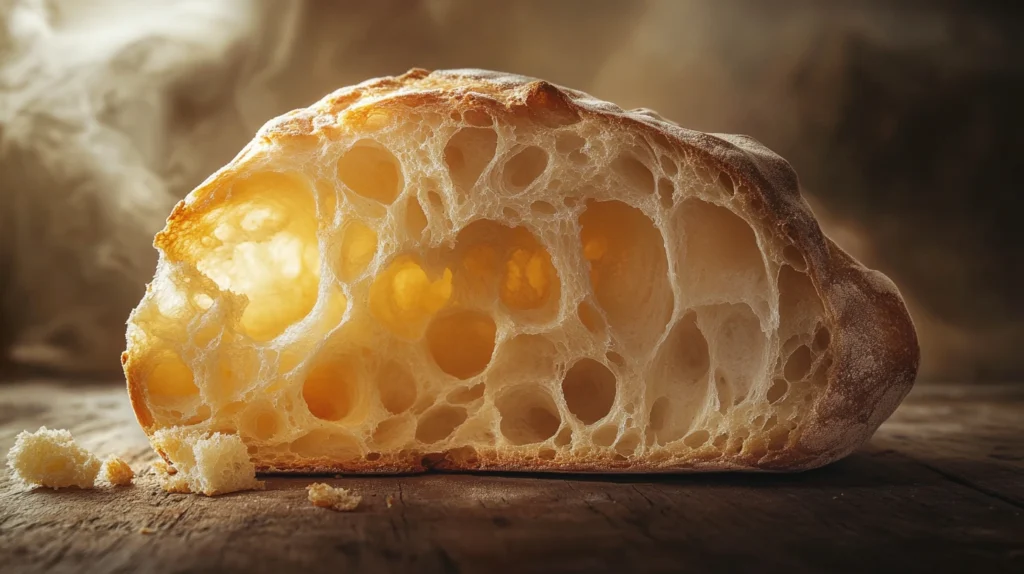
At first glance, Italian ciabatta may seem like just another loaf. But don’t let its rustic appearance fool you. Ciabatta stands out because of its high hydration dough, meaning it contains a lot more water than typical bread doughs. This unique feature contributes to its signature holes—also known as an “open crumb”—which bakers strive to achieve through careful fermentation and handling.
Another distinct trait of ciabatta is its crisp yet delicate crust. Unlike the thick, hard crusts of some traditional European loaves, ciabatta offers a balanced crunch that gives way to a delightfully chewy interior. It’s light and airy but still holds up beautifully in sandwiches and grilled recipes.
Flavor-wise, ciabatta is mild, slightly tangy due to fermentation, and designed to enhance rather than overpower other ingredients. It’s often enjoyed with olive oil and herbs, making it the perfect companion to Italian antipasti or as a sandwich base.
So what’s the secret to getting it just right? It’s all in the process: the flour type, the long proofing time, and the minimal handling required to keep the dough light and airy. And that’s just the beginning—we’ll cover every aspect of this beautiful bread in the sections ahead.
In fact, ciabatta pairs beautifully with warm dishes such as the Best Potsticker Soup, where its airy texture soaks up every drop of broth.
The History of Italian Ciabatta
Origins in Veneto, Italy
While many Italian breads trace their roots back hundreds of years, ciabatta is a modern creation by comparison. This rustic loaf was first developed in 1982 in Adria, a town located in the Veneto region of northern Italy. The man behind the magic was a baker named Arnaldo Cavallari, who sought to create an Italian bread that could stand up to the growing popularity of French baguettes, especially in the sandwich market.
At the time, baguettes were widely used for panini-style sandwiches in Italy, but many Italian bakers wanted to reclaim their national bread pride. Cavallari experimented with flour types, hydration levels, and fermentation times, eventually producing a light, airy, and crusty bread that could rival the French classic—thus, ciabatta was born.
He named his creation ciabatta Polesano, in reference to its slipper-like shape and his home province of Rovigo in the Polesine area of Veneto. What started as a regional solution quickly caught the attention of bakers across Italy and then internationally.
Evolution Over the Years
After its invention, ciabatta spread like wildfire across Italy. It was adaptable, flavorful, and perfectly suited for Italy’s culinary culture. Within just a few years, bakeries across the country began producing their own versions of ciabatta, incorporating regional flours and techniques.
By the late 1980s and early 1990s, ciabatta had made its way to Europe, North America, and Asia, thanks in large part to partnerships between Italian flour mills and global bakeries. It found a natural home in cafes and sandwich shops, especially because of its ability to hold up under press grilling, making it ideal for panini.
Unlike many traditional breads that lose popularity over time, ciabatta has only grown in appeal, especially among artisan bakers who appreciate the challenges of working with high hydration dough. Today, it’s a staple in both artisan bakeries and large-scale commercial production lines, each putting their own spin on the loaf while staying true to its origins.
Interestingly, ciabatta is also a bread that has benefitted from modern baking science. Many recipes now include preferments like biga or poolish to improve flavor and texture, techniques that were rare in home kitchens before ciabatta’s rise in fame.
Ciabatta vs. Other Breads
Let’s put ciabatta in perspective by comparing it to other popular breads you might be familiar with:
| Bread Type | Texture | Crust | Best Use | Hydration Level |
|---|---|---|---|---|
| Ciabatta | Light, airy, open crumb | Thin and crispy | Sandwiches, dipping, grilling | High |
| Baguette | Chewy, dense | Thick and crunchy | Plain or with butter | Medium |
| Focaccia | Soft, oily | Thick, soft | Served with meals, appetizers | Medium |
| Sourdough | Chewy, tangy | Hard and crusty | Toast, sandwiches, platters | Varies (usually high) |
| White Bread | Soft, fine crumb | Soft | General use, kids’ sandwiches | Low |
What makes Italian Ciabatta stand out is its combination of simplicity and texture. It’s a no-frills bread that delivers rich flavor and a distinct eating experience thanks to its structure. The high hydration means more steam during baking, which leads to that iconic open crumb—those lovely large air pockets you see when you slice into a loaf.
Unlike focaccia, which is enriched with olive oil and often topped with herbs, or sourdough, which develops its character through fermentation over several days, ciabatta is a quicker bread to produce but still full of personality.
Ingredients Used in Italian Ciabatta
Traditional Ingredients
Italian ciabatta might appear simple, but its greatness lies in its minimal yet carefully balanced ingredients. At its core, ciabatta is made from just five components:
- Flour
- Water
- Salt
- Yeast
- Olive Oil (optional in some variations)
That’s it. No eggs, no dairy, no sugars or preservatives—just basic pantry staples. Yet, when treated with precision, these ingredients produce a loaf with a golden crust, chewy texture, and incredible depth of flavor.
The simplicity of the dough makes it a perfect partner for bold fillings, like those found in this Honey Mustard Turkey Sandwich—a satisfying and flavorful way to use leftover ciabatta.
Each component plays a crucial role:
- Flour provides structure.
- Water influences hydration and creates the open crumb.
- Yeast helps the dough rise.
- Salt enhances flavor and controls fermentation.
- Olive Oil (used sparingly) adds softness and subtle richness, especially in softer ciabatta styles.
This bread follows the principle of “less is more,” where technique matters just as much as ingredients. And that’s especially true when it comes to flour.
Importance of Flour Type
When baking ciabatta, not just any flour will do. The type of flour you use directly affects the dough’s ability to develop gluten, which is key to forming the stretchy, elastic structure required for that signature open crumb.
Italian bakers traditionally use Tipo 0 or Tipo 00 flour, known for being finely milled and high in protein. These flours allow for excellent gluten development without being too heavy. If those aren’t available, bread flour with a protein content of at least 11–13% is a great alternative.
Here’s a quick comparison of flour types and their impact:
| Flour Type | Protein Content | Best For | Result in Ciabatta |
|---|---|---|---|
| Tipo 00 | ~11–12% | Soft, elastic doughs | Silky texture, mild flavor |
| Bread Flour | ~12–14% | Strong gluten development | Chewy crumb, good volume |
| All-Purpose Flour | ~10–11% | Versatile but limited stretch | Denser, less airy structure |
| Whole Wheat Flour | ~13–14% | Nutty flavor, denser loaves | Rich taste, smaller holes |
Some bakers even mix a portion of whole grain or rye flour into their ciabatta to add earthy tones or a more complex taste, but this must be done carefully to avoid compromising the light texture.
Hydration and Texture
One of the defining characteristics of Italian ciabatta is its high hydration level, which typically ranges between 70% and 80%, meaning there is 70–80g of water for every 100g of flour. This high water content is what gives ciabatta its light, hole-filled crumb and slightly sticky dough.
But here’s the thing: high hydration makes the dough harder to handle. It’s loose, wet, and doesn’t behave like traditional bread doughs. To work with it successfully, bakers use techniques like:
- Stretch and folds instead of kneading
- Wet hands or oiling surfaces to prevent sticking
- Minimal shaping to preserve air pockets
When done right, the result is an airy, open crumb that has become the gold standard for ciabatta loaves. Every hole in the crumb is proof of proper fermentation and gentle handling.
And speaking of fermentation—many expert bakers opt for a preferment like biga (a dry, stiff starter used 12–16 hours in advance) to boost flavor and improve the dough’s structure naturally.
Optional Enhancements and Additions
While traditional ciabatta is made with basic ingredients, modern variations sometimes include:
- Milk or yogurt – for a softer crumb
- Herbs like rosemary or thyme – for aroma and flavor
- Olives or sun-dried tomatoes – for savory twists
- Sourdough starter – for added tang and complexity
These additions give bakers room for creativity while still honoring the spirit of ciabatta. However, any additions should be balanced so they don’t overwhelm the bread’s naturally mild flavor.
Step-by-Step Guide to Making Italian Ciabatta
Preparing the Dough
Creating Italian ciabatta at home starts with mixing a simple dough, but due to its high hydration, this dough behaves differently from traditional bread doughs. Here’s how to get started:
Ingredients (Basic Ciabatta Recipe):
- 500g bread flour or Italian Tipo 00 flour
- 400g water (80% hydration)
- 10g salt
- 5g instant yeast or 15g fresh yeast
- 10g olive oil (optional)
- 100g biga (preferment, optional but highly recommended)
Step 1: Mix the Biga (Optional but Recommended)
If using a biga:
- Mix 100g flour, 50g water, and a pinch of yeast.
- Cover and leave at room temperature for 12–16 hours.
The biga enhances the flavor and structure of the bread. It develops mild acidity and improves the crust and crumb.
Step 2: Combine Ingredients
- In a large bowl, mix the flour, yeast, and salt.
- Add the water slowly and stir with a wooden spoon or use a stand mixer on low.
- Add olive oil and the biga (if using) once flour is mostly hydrated.
- Mix for about 5–7 minutes until the dough is smooth and elastic, but still wet and sticky.
💡 Tip: Use cold water if your kitchen is warm to slow fermentation and improve flavor.
First and Second Rise
Fermentation is where ciabatta develops its airy interior and delicate flavor.
Step 1: Bulk Fermentation
- Place the dough in a lightly oiled bowl.
- Cover with a damp towel or plastic wrap.
- Let it rise at room temperature for 1.5 to 2 hours.
During this period, perform 3 sets of stretch and folds every 30 minutes:
- With wet hands, gently pull one side of the dough and fold it over.
- Turn the bowl and repeat 3 more times.
- This strengthens the gluten and traps gas bubbles.
Step 2: Pre-Shaping
- Once doubled in size and bubbly, carefully turn the dough onto a floured surface.
- Avoid punching down or kneading—handle gently to preserve air pockets.
💡 Tip: Flour your hands and surface well to prevent sticking.
Shaping and Final Proof
Shaping ciabatta is less precise than other breads. Its loose structure means we don’t roll or press it much.
Step 1: Divide and Shape
- Using a bench scraper, divide the dough into 2 or 3 rectangular loaves.
- Gently stretch each piece into a rough slipper shape.
- Place each on a floured baking sheet or parchment paper.
Don’t worry if they look uneven—ciabatta’s charm lies in its rustic look.
Step 2: Final Rise
- Cover loosely with a floured cloth or plastic wrap.
- Let rest for 45–60 minutes until slightly puffed.
Avoid overproofing; if the dough collapses, it may be over-risen.
Baking the Perfect Ciabatta
Now comes the magic: turning your dough into golden, airy bread.
Step 1: Preheat the Oven
- Heat your oven to 230°C (450°F).
- Place a baking stone or upside-down tray inside to mimic a bread oven.
- Optionally, prepare a tray of hot water for steam.
Steam helps form a crispy crust.
Step 2: Bake
- Slide the loaves (on parchment) onto the hot surface.
- Bake for 20–25 minutes until golden brown.
- Tap the bottom—it should sound hollow.
💡 Tip: Rotate the tray halfway through baking for even browning.
Step 3: Cool
Let ciabatta cool completely on a wire rack before slicing. This final step sets the crumb and improves texture.
Want a unique twist on sandwich-making? Use ciabatta instead of regular bread in recipes like the Layered Mexican Salad for a side that stands up to bold flavors.
Summary of the Baking Process
Here’s a quick recap of key stages:
| Stage | Time | Key Actions |
|---|---|---|
| Biga Fermentation | 12–16 hours | Develop flavor and strength |
| Dough Mixing | 5–10 mins | Create smooth, sticky dough |
| First Rise | 1.5–2 hours | Stretch and fold every 30 mins |
| Pre-shape & Rest | 20 mins | Divide dough, gentle handling |
| Final Proof | 45–60 mins | Let loaves puff up slightly |
| Baking | 20–25 mins | High heat, steam optional |
| Cooling | 1 hour | Set crumb and crust |
Tips for Perfecting Homemade Ciabatta
Common Mistakes to Avoid
Even though Italian ciabatta uses simple ingredients, the technique is everything. Many beginner bakers run into similar issues when trying to get that perfect open crumb and crispy crust. Let’s walk through some of the most common mistakes—and how to avoid them.
❌ Mistake #1: Overworking or Kneading the Dough
Ciabatta dough is delicate and doesn’t need heavy kneading like traditional breads. Too much handling can break down the bubbles you’re trying to build.
✔️ Solution: Use stretch-and-folds during the first rise instead of kneading. This gently strengthens the dough while preserving its airy structure.
❌ Mistake #2: Skipping High Hydration
Reducing the water in the dough to make it easier to handle may seem like a good idea—but you’ll sacrifice the signature holes and texture.
✔️ Solution: Embrace the stickiness! Use wet or oiled hands, and don’t panic if the dough is loose. That’s exactly what you want.
❌ Mistake #3: Overproofing
Leaving your dough to rise too long can cause it to collapse in the oven, resulting in flat, dense loaves.
✔️ Solution: Keep an eye on timing and temperature. The dough should look puffed, not bloated. If you poke it and it springs back slowly, it’s ready.
❌ Mistake #4: Underbaking
If you pull your ciabatta out too early, the inside will be gummy and the crust won’t crisp properly.
✔️ Solution: Bake until the crust is a deep golden color and the bottom sounds hollow when tapped. Use an oven thermometer to make sure you’ve reached 230°C (450°F).
❌ Mistake #5: Cutting Too Soon
Cutting into ciabatta while it’s still hot might feel tempting, but it ruins the crumb and lets out essential steam.
✔️ Solution: Let your loaf cool for at least 1 hour before slicing. The crumb continues to set as it cools.
Mastering the Open Crumb
One of the most prized features of ciabatta is its light, airy interior filled with large holes—what bakers call an open crumb. Getting it right requires technique, patience, and a few pro tricks.
💡 Use a Preferment
A biga or poolish starter creates stronger gluten and deeper flavor. It also helps produce a better crumb structure and more complex taste.
💡 Minimal Handling
Every time you press or knead the dough, you deflate those precious air pockets. Be gentle when dividing and shaping the dough—don’t roll it out or squash it.
💡 Strong Flour and Proper Hydration
Higher-protein flour creates more gluten, and more gluten means more support for those big bubbles. Also, high hydration (75–80%) is non-negotiable if you want a dramatic crumb.
💡 Hot Oven and Steam
A preheated oven with steam gives the loaf time to expand before the crust hardens. That extra lift adds volume and more irregular holes.
Tools That Make a Difference
While you can bake ciabatta with minimal equipment, having the right tools can make the process smoother and help you achieve bakery-level results.
🔪 Bench Scraper
Perfect for dividing sticky dough and shaping without tearing. Also helps lift the dough without disturbing air bubbles.
🧂 Digital Scale
Ciabatta is all about precision. Weighing your ingredients—especially water and flour—gives you better control over hydration and consistency.
🥄 Stand Mixer (Optional)
While not required, a mixer with a dough hook can help develop gluten without tiring your arms during the initial mix.
🔥 Baking Stone or Steel
Creates a hot surface that helps with oven spring (the initial rise in the oven), leading to a better crust and more lift.
💨 Spray Bottle or Steam Tray
Adding steam in the first 10 minutes of baking ensures a shiny, crackly crust. You can use a spray bottle or place a tray of water in the oven.
📏 Dough Scraper or Lame
Used for scoring dough, though ciabatta is often left unscored for its rustic shape. Still, handy for shaping and lifting.
Troubleshooting Table
| Problem | Likely Cause | Solution |
|---|---|---|
| Flat loaf | Overproofed dough | Shorten final proof time |
| Dense crumb | Low hydration or poor handling | Increase water, use gentler shaping |
| Cracked crust | Oven too hot or no steam | Add steam and preheat oven properly |
| Pale color | Underbaked or low sugar in dough | Extend baking time, allow full browning |
| Gummy interior | Sliced too early | Let bread cool completely before cutting |
Regional Variations of Ciabatta
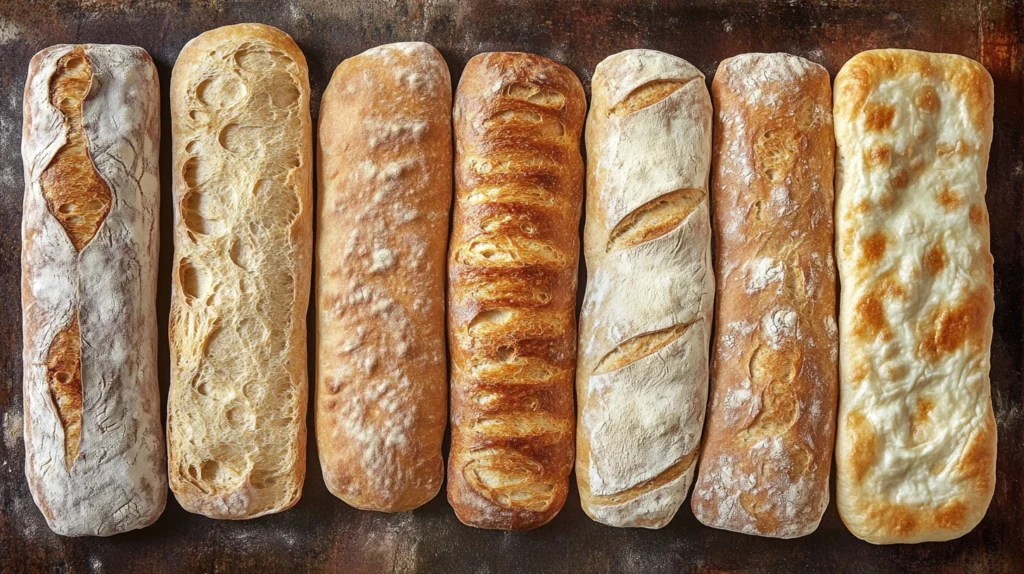
Italian ciabatta may have originated in Veneto, but bakers across Italy have added their own twist to this beloved bread. Let’s explore a few well-known regional styles.
Ciabatta Romana
From the region around Rome, Ciabatta Romana is known for being lighter and airier, with an ultra-thin crust and an almost cloud-like interior. It often uses higher hydration and a longer fermentation to develop flavor and structure.
- Crust: Thin and crisp
- Crumb: Extremely open
- Best use: Sandwiches or panini
Ciabatta Integrale
This version uses whole wheat flour, giving the bread a heartier texture and nutty flavor. It’s slightly denser but adds complexity and nutritional value.
- Crust: Hearty, sometimes rustic
- Crumb: Tighter with some holes
- Best use: Paired with strong cheeses or soups
Ciabatta al Latte
Also known as “milk ciabatta,” this style includes a small amount of milk in the dough, which softens the crumb and makes the crust less crisp.
- Crust: Soft and light brown
- Crumb: Tender and even
- Best use: Breakfast or kids’ sandwiches
How to Serve and Enjoy Italian Ciabatta
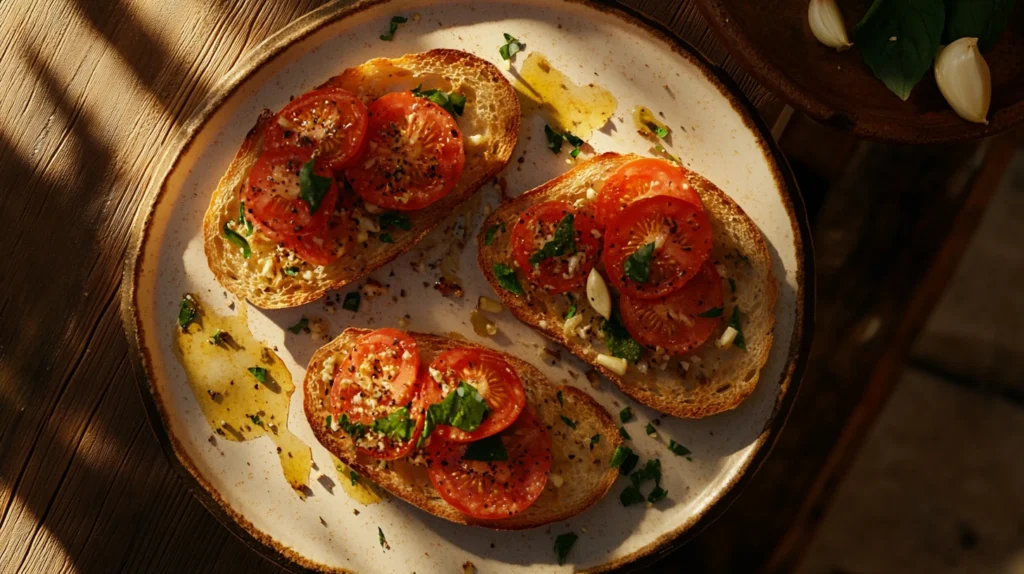
Italian ciabatta is versatile and pairs beautifully with both simple and gourmet ingredients. Here are some of the most delicious ways to enjoy it:
With Olive Oil and Balsamic
One of the most traditional Italian ways to enjoy ciabatta is by dipping it in extra virgin olive oil with a splash of aged balsamic vinegar. Add a pinch of sea salt or crushed garlic for extra flavor.
As Sandwich Bread
Its chewy structure makes ciabatta ideal for panini or toasted sandwiches. Try fillings like:
- Prosciutto, mozzarella, and arugula
- Grilled vegetables and pesto
- Roast beef with horseradish cream
Toasted or Grilled
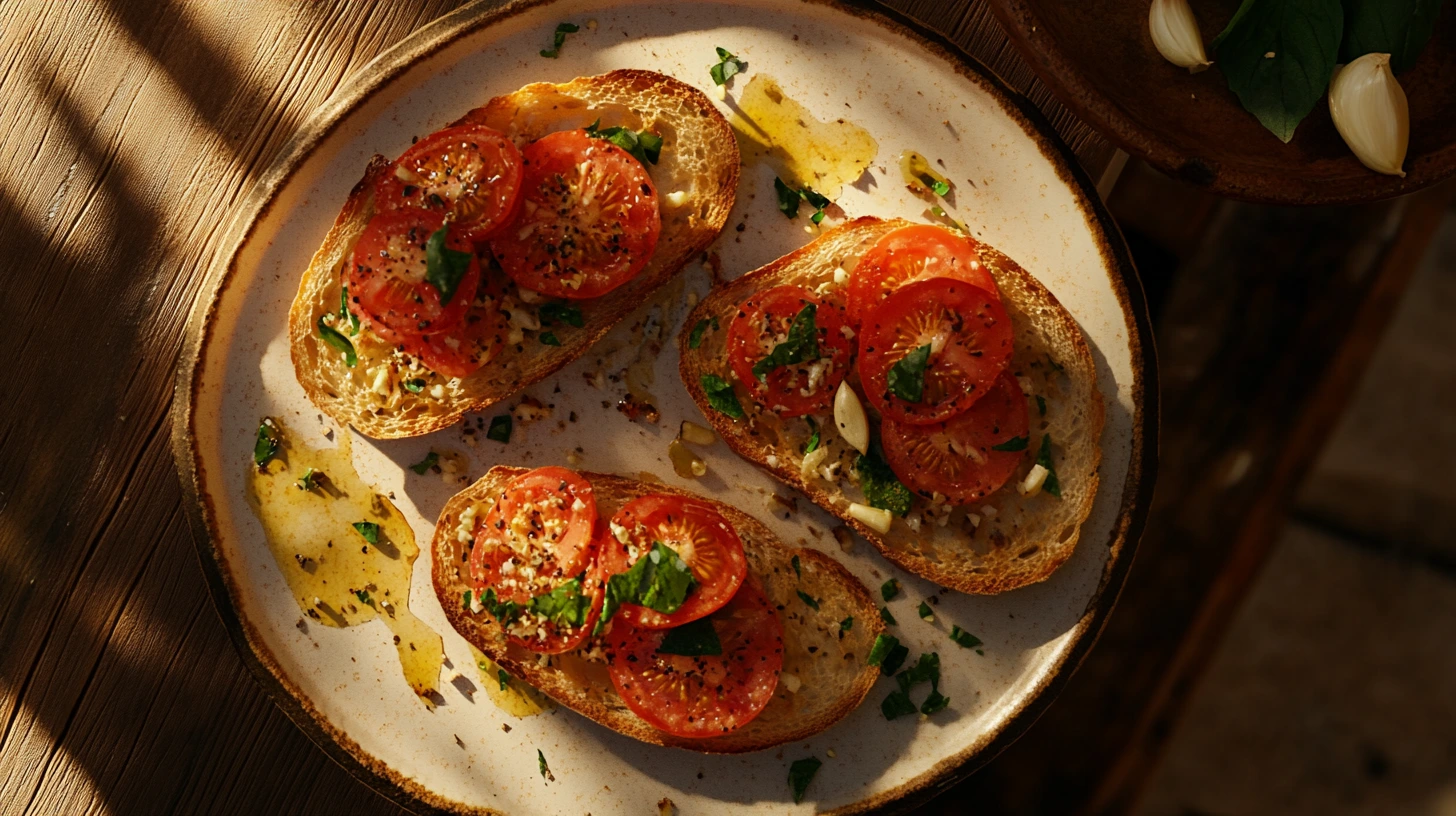
Ciabatta also makes amazing bruschetta. Toast thick slices and top with chopped tomatoes, garlic, basil, and olive oil. Or grill it for a crispy base under melted cheese or cured meats.
Frequently Asked Questions
What makes ciabatta different from bread?
Ciabatta is different from many other types of bread due to its unique texture, high hydration, and rustic appearance. Unlike standard white bread or sandwich loaves that are soft and uniform, ciabatta features a crispy, golden crust and an open, airy crumb with large holes. Its dough is wetter than most bread doughs, which contributes to its chewy bite and light structure. It’s typically shaped into long, flat loaves that resemble a slipper—hence the name. These characteristics make ciabatta ideal for dipping, toasting, and building hearty sandwiches.
Is Italian ciabatta healthy?
Italian ciabatta can be a healthy choice, especially when it’s made using traditional methods with natural ingredients. Classic ciabatta recipes consist of just flour, water, yeast, and salt—no preservatives, added sugars, or unhealthy fats. When baked properly, it’s low in fat and cholesterol, and provides energy through complex carbohydrates. Whole wheat ciabatta, also known as ciabatta integrale, adds fiber and nutrients. However, ciabatta is not gluten-free, and those with celiac disease or gluten sensitivities should avoid it or opt for specially formulated versions.
How do Italians eat ciabatta?
Italians enjoy ciabatta in many delicious ways, both simple and gourmet. Traditionally, it’s served as an accompaniment to meals, especially with olive oil and balsamic vinegar for dipping. It’s also popular in panini—Italian grilled sandwiches—filled with ingredients like prosciutto, mozzarella, roasted vegetables, or cured meats. For breakfast or light snacks, Italians often toast ciabatta and top it with butter, jam, or Nutella. At dinner, it’s common to serve it alongside soups, stews, or antipasti platters. Its versatility and neutral flavor make ciabatta a go-to bread across many Italian households.
What is ciabatta in Italian?
In Italian, “ciabatta” means “slipper”, referring to the bread’s distinctive shape—flat, elongated, and slightly curved like a house slipper. The name was coined by the bread’s creator, Arnaldo Cavallari, in the 1980s, when he invented ciabatta as an Italian alternative to the French baguette. The full term ciabatta di pane literally translates to “slipper of bread.” Despite its modern origin, ciabatta has quickly become a staple of Italian bakeries and is now globally recognized for its rustic charm and artisanal quality.
Conclusion
Italian ciabatta is a true icon of modern bread baking. Its simple ingredients and rustic charm hide a complex and rewarding baking process that has captivated bakers and food lovers alike. Whether you enjoy it with olive oil, use it for gourmet sandwiches, or bake it from scratch at home, ciabatta offers a perfect balance of flavor, texture, and versatility.
Now that you’ve explored its origins, mastered the techniques, and discovered creative ways to enjoy it—why not try baking your own loaf? Once you do, you’ll understand why ciabatta remains one of Italy’s most loved and exported bread varieties.
Italian Ciabatta
Equipment
- Digital kitchen scale
- Large mixing bowl
- Bench scraper
- Dough scraper
- Kitchen towel or plastic wrap
- Baking sheet or parchment paper
- Baking stone or steel (optional)
- Oven with steam tray or spray bottle
- Wire cooling rack
Ingredients
- For the Dough:
- 500 g bread flour or Tipo 00 flour
- 400 g water 80% hydration
- 10 g salt
- 5 g instant yeast or 15g fresh yeast
- 10 g olive oil optional
- Optional Preferment Biga:
- 100 g flour
- 50 g water
- A pinch of yeast
Instructions
- Make the Biga (Optional, 12–16 hours before):
- Mix 100g flour, 50g water, and a pinch of yeast. Cover and let ferment at room temperature.
- Mix the Dough:
- In a large bowl, combine flour, yeast, and salt. Gradually add water and mix until incorporated. Add olive oil and the prepared biga (if using). Mix until sticky and elastic.
- First Rise (Bulk Fermentation):
- Cover the bowl and let rest for 2 hours at room temperature. Perform stretch and folds every 30 minutes to strengthen gluten.
- Pre-shape the Dough:
- Lightly flour a surface and gently turn the dough out. Divide into 2–3 rectangular loaves using a bench scraper. Handle gently to retain air bubbles.
- Final Proof:
- Place shaped loaves on parchment paper. Cover loosely and let rise for 45–60 minutes, until slightly puffed.
- Preheat Oven:
- Preheat oven to 230°C (450°F) with a baking stone or tray inside. Place a tray of hot water at the bottom or use a spray bottle to create steam.
- Bake:
- Slide the loaves onto the hot surface. Bake for 20–25 minutes until golden brown and hollow-sounding when tapped underneath.
- Cool:
- Let cool on a wire rack for at least 1 hour before slicing.

