
Few desserts capture the hearts (and tastebuds) of both kids and adults quite like Mini Oreo Cheesecakes. These bite-sized treats combine the rich, creamy texture of classic cheesecake with the unbeatable crunch and chocolatey goodness of America’s favorite cookie: the Oreo. Whether you’re planning a party, need a simple yet impressive dessert for family gatherings, or just want something sweet and indulgent for your late-night cravings, mini Oreo cheesecakes hit the sweet spot — every single time.
Not only are they easy to make, but they’re also a guaranteed crowd-pleaser. No slicing, no mess — just creamy, chocolatey bliss in a cupcake liner. And the best part? You only need a handful of simple ingredients and a muffin tin to get started. From the moment you take your first bite, you’ll understand why these little desserts have become a viral sensation on Pinterest, TikTok, and Instagram.
In this complete guide, we’ll walk you through everything you need to know about making perfect Mini Oreo Cheesecakes at home. We’ll cover the essential ingredients, expert baking tips, fun variations, and even common mistakes to avoid. Whether you’re a beginner or a baking pro, this article is your go-to resource for Oreo cheesecake magic.
Let’s dive into the delicious world of mini cheesecakes — one creamy bite at a time.🍪🧁🎂
Hint: They’re just as crowd-pleasing as our festive Easter Chocolate Lasagna — another must-try no-bake dessert for the holidays!

Why Mini Oreo Cheesecakes Are So Popular
Bite-Sized Bliss for Every Occasion
Mini Oreo cheesecakes are as versatile as they are delicious. Their small size makes them perfect for serving at birthdays, weddings, baby showers, holiday buffets, or even as edible gifts. No utensils are needed, and their individual portions make them easy to serve, store, and share. You can transport them in a cupcake carrier, pack them in lunchboxes, or display them beautifully on a dessert table.
Oreo + Cheesecake: A Match Made in Dessert Heaven
Let’s face it: Oreos are a nostalgic favorite for millions, and cheesecake is one of the most beloved desserts worldwide. When you combine them, the result is irresistible. The Oreo crust adds crunch and chocolate flavor, while the smooth cheesecake filling balances it out with creamy sweetness. It’s a textural and flavor combination that just works — and works brilliantly.
And just like our Kentucky Cream Pull Candy, they offer a nostalgic twist that’s both comforting and crave-worthy.
Essential Ingredients for Perfect Mini Oreo Cheesecakes
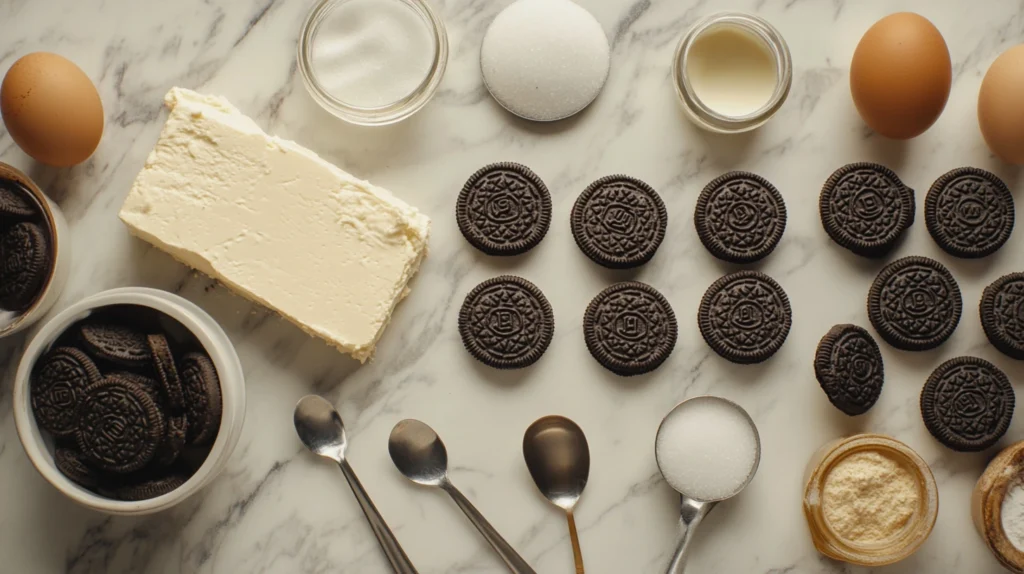
The beauty of mini Oreo cheesecakes lies in their simplicity. You don’t need anything fancy — just a few core ingredients that come together to create magic. But the quality and type of each ingredient can make a big difference in taste and texture.
Choosing the Right Cream Cheese
Cream cheese is the heart and soul of any cheesecake recipe. For the best results, use full-fat block-style cream cheese. This type has less water content than spreadable or whipped varieties, which means a richer, creamier filling that sets beautifully.
- Top brands: Philadelphia is a classic choice for its consistency and rich flavor, but store brands often work well too.
- Pro Tip: Always bring your cream cheese to room temperature before mixing. Doing this promotes even mixing and a smooth, lump-free batter.
Why Double Stuf Oreos Make a Difference
While regular Oreos are the traditional go-to, Double Stuf Oreos add an extra layer of creamy filling that enhances the richness of the crust and provides a softer base. You can also play with Oreo flavors — like golden, mint, or red velvet — to give your cheesecakes a creative twist.
- For the crust: Use the whole cookie — cream and all. No need to scrape!
- For toppings: Crushed Oreos make the perfect garnish for a crunchy, decorative finish.
Other Key Ingredients
Here’s a simple list of what else you’ll need:
- Granulated Sugar: Sweetens the cheesecake without overpowering it.
- Vanilla Extract: Adds depth and enhances the Oreo flavor.
- Eggs: Help set the cheesecake so it bakes firm but creamy.
- Sour Cream or Greek Yogurt: Adds a touch of tang and improves texture.
- Salt: Just a pinch sharpens the flavor and balances the sweetness.
Tools & Equipment You’ll Need
Even if you don’t bake often, most of the tools for this recipe are probably already in your kitchen. But a few key pieces can make your baking smoother and your cheesecakes more professional-looking.
Muffin Tin or Cupcake Pan
This is non-negotiable. A standard 12-cup muffin tin is perfect for creating mini cheesecakes. If you want smaller bites, you can use a mini muffin tin, but you’ll need to reduce the baking time slightly.
Cupcake Liners
Always use paper or foil liners for easy removal and serving. They also keep the cheesecakes neat and make them easier to store or transport.
Hand Mixer or Stand Mixer
A smooth, lump-free filling begins with properly creaming the sugar and cream cheese together. A hand mixer works well, but a stand mixer will give you a fluffier texture with less effort.
Do You Need a Food Processor?
For the crust, a food processor makes crushing Oreos quick and uniform. If you don’t have one, no worries — a zip-top bag and a rolling pin do the job just fine.
Optional But Helpful Tools
- Ice Cream Scoop: Great for evenly portioning batter into liners.
- Rubber Spatula: Helps scrape down the bowl completely.
- Cooling Rack: Allows air to circulate and prevents soggy bottoms.
Looking for a low-carb take on cheesecake? You might enjoy our Keto Breakfast Casserole — it’s not a dessert, but it’s packed with creamy, savory goodness.
Step-by-Step Recipe for Mini Oreo Cheesecakes
Creating these irresistible cheesecakes is easier than you think. With just a few simple steps, you’ll have a tray of creamy, chocolatey, bakery-worthy treats ready to wow your tastebuds.
Making the Crust
Every good cheesecake starts with a solid foundation. For Mini Oreo Cheesecakes, the crust is as easy as it gets — just Oreos and a little butter.
Ingredients for Crust:
- 16 Oreo cookies
- 3 tablespoons melted butter (unsalted)
Instructions:
- Preheat your oven to 325°F (163°C). Line a muffin tin with 12 cupcake liners.
- In a food processor, pulse the Oreos (with filling) into fine crumbs. If you don’t have a food processor, just crush the cookies in a zip-top bag with a rolling pin.
- Pour in the melted butter and mix until all crumbs are evenly coated.
- Spoon about 1 tablespoon of the mixture into each liner, pressing it down firmly with the back of a spoon or the bottom of a small glass.
- Bake the crusts for 5 minutes. Remove from oven and let cool while you prepare the filling.
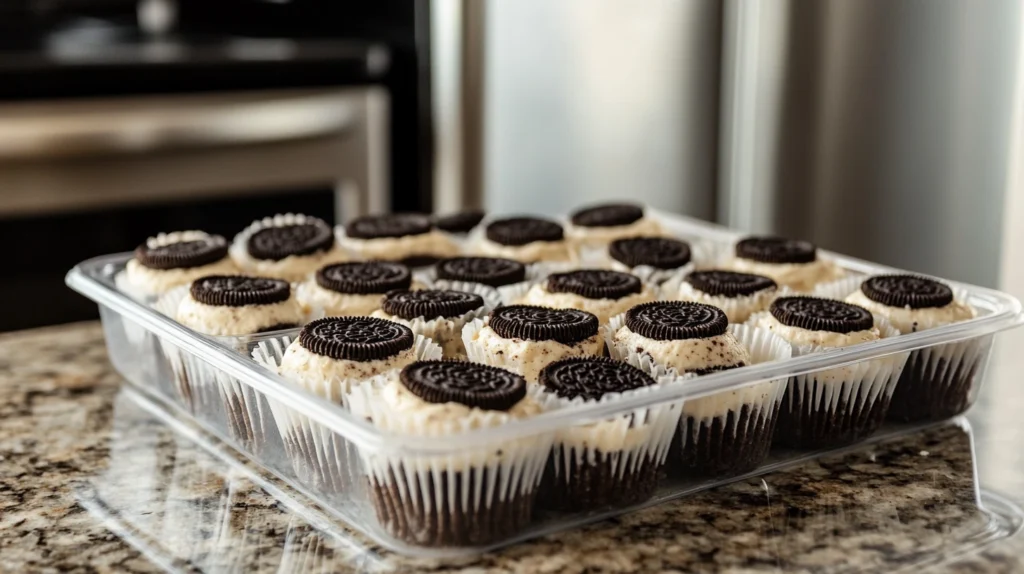
Pro Tip: Use a whole Oreo cookie instead of crumbs for a super simple crust base — it fits perfectly in each cupcake liner!
Crafting the Creamy Cheesecake Filling
This part is where the magic happens — rich, smooth, and just the right amount of sweet. It’s important to mix thoroughly but gently to keep the texture light.
Ingredients for Filling:
- 16 oz (450g) full-fat cream cheese, softened
- ½ cup granulated sugar
- 1 teaspoon vanilla extract
- 2 large eggs
- ½ cup sour cream or plain Greek yogurt
- Pinch of salt
- Optional: 6 crushed Oreos, folded into the batter
Instructions:
- In a large bowl, beat the cream cheese on medium speed until smooth and creamy (about 1–2 minutes).
- Add sugar and vanilla. Continue mixing until well incorporated.
- Add eggs one at a time, mixing just until combined.
- Incorporate the sour cream and a small amount of salt with a light hand.
- If using, stir in the crushed Oreos for that classic cookies-and-cream vibe.
Pro Tip: Don’t overmix after adding eggs. Overbeating introduces air, which can lead to cracks.
Baking and Cooling
- Spoon the filling into the cooled crusts, filling each liner almost to the top.
- Bake for 16 to 18 minutes at 325°F (163°C), just until the centers are a bit jiggly and the outer edges have set.
- With the oven off, open the door slightly and allow the cheesecakes to remain inside for 5 to 10 minutes.This gradual cooling helps prevent cracks.
- Remove from oven and let cool to room temperature in the tin.
Pro Tip: Don’t worry if they puff up during baking — they’ll settle nicely as they cool.
Chilling and Serving
Chilling is crucial. The texture firms up and the flavors intensify.
- After cooling, refrigerate the cheesecakes in the tin for at least 2 hours, preferably overnight.
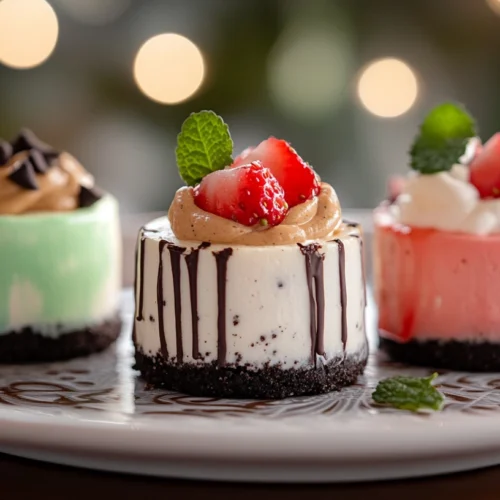
- When ready to serve, remove the liners and top with whipped cream, crushed Oreos, or even a drizzle of chocolate ganache.
Serving Tip: For a pretty finish, add a mini Oreo cookie on top of each cheesecake as a garnish. Instant dessert table showstopper!
Creative Twists on the Classic Mini Oreo Cheesecakes
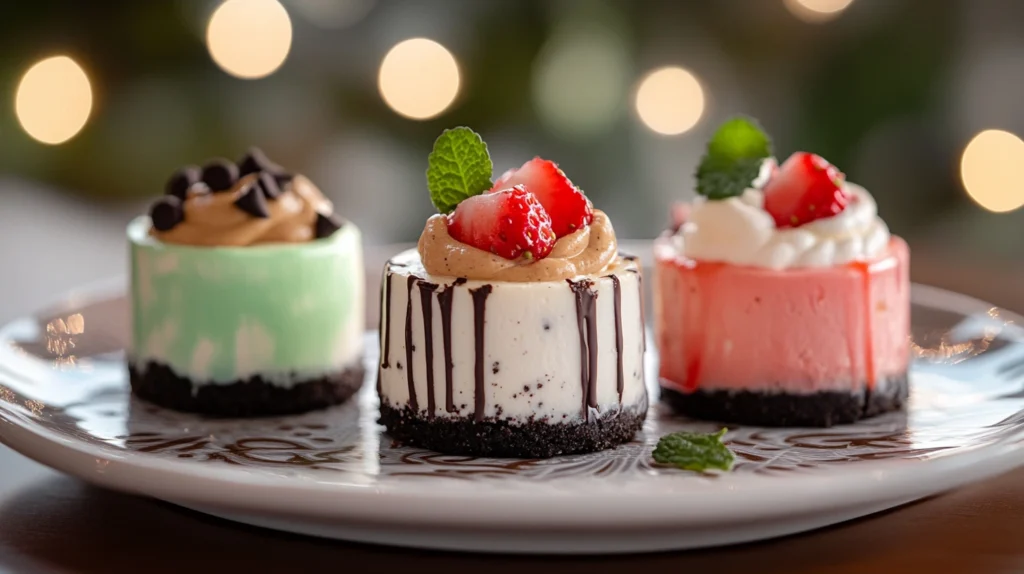
One of the best things about mini Oreo cheesecakes is how adaptable they are. You can change the crust, add exciting flavors to the filling, and create themed versions for holidays or personal tastes. Let’s look at some mouthwatering ways to switch things up.
Peppermint Oreo Cheesecakes
Perfect for the holidays, these mini cheesecakes bring a refreshing twist with just a hint of cool mint. They’re ideal for Christmas dessert tables or winter parties.
Ingredients & Tips:
- Use Mint Oreos or add ½ teaspoon of peppermint extract to the filling.
- Top with crushed candy canes or mint chocolate chips for a festive finish.
- Pair with whipped cream and a drizzle of dark chocolate sauce for a sophisticated flavor boost.
Flavor Profile: Creamy, minty, and chocolatey — like peppermint bark in cheesecake form.
Peanut Butter Oreo Cheesecakes
If you’re a fan of peanut butter cups, this one’s for you! Chocolate and peanut butter are a legendary combo, and these mini cheesecakes deliver on every level.
How to Make It:
- Swap the regular Oreos for Peanut Butter Oreos, or mix ¼ cup of creamy peanut butter into the cheesecake filling.
- Add a few chopped peanuts or mini peanut butter cups on top.
- For extra indulgence, swirl in some melted peanut butter before baking.
Flavor Profile: Rich, nutty, and decadently sweet — perfect for peanut butter lovers.
Strawberry Swirl Oreo Cheesecakes
These are as pretty as they are tasty. A swirl of strawberry puree not only adds color but balances the richness of the cream cheese.
Steps to Customize:
- Spoon a bit of strawberry jam or puree onto each cheesecake and use a toothpick to create a swirl pattern before placing them in the oven.
- Golden Oreos offer a sweet, buttery base that highlights the fruit notes.
- Garnish with a slice of fresh strawberry after chilling.
Flavor Profile: Tangy, creamy, and visually stunning — great for Valentine’s Day or spring celebrations.
Mocha Oreo Cheesecakes
For the coffee lovers out there, adding a bit of espresso powder to your cheesecakes takes the flavor to a whole new level. It’s like enjoying a cookies-and-cream frappuccino in dessert form.
Try This:
- Add 1 teaspoon of instant espresso powder to the filling.
- Decorate with chocolate shavings and a coffee bean to elevate the presentation.
- Optional: Use chocolate-filled Oreos for a deeper flavor profile.
Bold coffee flavor meets smooth creaminess and a crunchy finish — great for special occasions or late-night indulgence.
Funfetti Oreo Cheesecakes (Kid-Friendly!)
Add a dash of fun with rainbow sprinkles! These are great for birthdays and make any table more colorful.
Customization Tips:
- Stir in 2 tablespoons of rainbow sprinkles into the batter before baking.
- Use Golden Oreos for a buttery, cake-like base.
- Top with whipped cream and more sprinkles.
Whimsical and sweet with just the right touch of fun — a treat kids can’t resist!
With these flavor variations, your mini Oreo cheesecakes can become a signature dessert that evolves with the season, event, or personal craving. Whether you’re hosting a fancy dinner party or just baking for fun, these creative ideas offer something for everyone.
Common Mistakes and How to Avoid Them
Even the most experienced bakers can run into trouble with cheesecake. But don’t worry — we’ve rounded up the top mistakes people make when baking mini Oreo cheesecakes and how to fix them. With these tips, you’ll turn out bakery-level treats every time.
Why Your Cheesecake Might Crack
One of the most frustrating cheesecake problems is cracking on the surface. While mini cheesecakes are less prone to this than full-size versions, it can still happen if you’re not careful.
What Causes Cracking?
- Overmixing the batter (especially after adding eggs)
- Sudden temperature changes
- Overbaking
How to Prevent It:
- Mix just until combined — especially after you add the eggs.
- For best results, cool the cheesecakes gradually by cracking the oven door.
- Don’t bake them too long; the centers should still jiggle slightly when you take them out.
Overbaking Woes
Cheesecakes that are baked too long can turn dry, grainy, or rubbery. And unfortunately, there’s no way to fix this after it happens.
Signs You’ve Overbaked:
- No jiggle in the center
- Cracked tops
- Dry texture after chilling
Pro Tips:
- Always bake at a low temperature (around 325°F / 163°C).
- Remove them from the oven while the centers still wobble slightly.
- Remember, they’ll continue cooking from residual heat and will firm up more as they cool and chill.
Lumpy Batter Problems
Nothing spoils a cheesecake like unexpected bits of unblended cream cheese.Lumps happen when ingredients are too cold or not properly mixed.
Solution:
- Use room temperature ingredients.
- Begin by beating the cream cheese on its own until there are no lumps left.
- To ensure an even batter, don’t forget to scrape the sides of the bowl as you mix.
Storage and Freezing Tips
Mini Oreo cheesecakes are perfect make-ahead desserts. They store well in both the fridge and freezer — as long as you follow a few key steps.
Fridge or Freezer?
You can refrigerate or freeze mini cheesecakes depending on how soon you plan to eat them.
- To preserve texture and taste, store in the fridge in a covered airtight container for no more than 5 days.
- Freezer: Wrap individually in plastic wrap, then place in a freezer-safe bag or container. They’ll keep for up to 2 months.
Pro Tip: If you’re freezing them with toppings (like whipped cream), do it after thawing, not before.
How to Thaw Mini Cheesecakes
When you’re ready to serve frozen cheesecakes, follow this gentle thawing process:
- Remove them from the freezer and unwrap.
- Place them in the fridge overnight, or let them sit at room temperature for about 1 hour.
- Add your favorite toppings right before serving.
Bonus Tip: For best results, avoid microwaving. It can create uneven texture and ruin the creamy consistency.
With these handy tips, your cheesecakes will not only look flawless but also taste their absolute best, whether fresh or frozen.
Frequently Asked Questions
How long can you keep mini cheesecakes in the fridge?
Mini cheesecakes can be safely stored in the refrigerator for up to 5 days. It’s important to keep them in an airtight container to preserve their creamy texture and prevent them from absorbing odors from other foods. For the best taste and freshness, consume within 3 days.
How long does Oreo cheesecake last in the fridge?
Whether it’s a full-sized Oreo cheesecake or mini versions, the shelf life in the fridge is typically the same: 4 to 5 days. After that, the crust may start to soften and the flavor can change slightly. For optimal texture and taste, serve them within the first few days after chilling.
Can you freeze mini Oreo cheesecakes?
Yes, absolutely! Mini Oreo cheesecakes are freezer-friendly. Simply wrap each cheesecake individually in plastic wrap, then store them in a freezer-safe container or zip-top bag. They keep well in the freezer for as long as two months. To enjoy, thaw overnight in the refrigerator or let them sit at room temperature for about an hour.
Why did my mini cheesecakes fall?
Mini cheesecakes often fall or sink in the center due to rapid cooling or overmixing the batter (especially after adding the eggs). To prevent this, allow them to cool gradually in the oven with the door slightly open. Also, avoid opening the oven door during baking, and mix the batter gently once the eggs are added to reduce air bubbles.
How do you keep mini cheesecakes from cracking?
Cracks form due to overbaking, rapid cooling, or excess air in the batter. Here’s how to avoid them:
- Don’t overmix, especially after adding eggs.
- Bake at a low, consistent temperature (325°F / 163°C).
- Let them cool slowly in the oven for 5–10 minutes before removing.
- Don’t skip the chill time — it helps set the texture and flavor.
What happens if cheesecake doesn’t cool?
If you don’t cool your mini cheesecakes properly before chilling, the texture may be too soft and the flavor won’t be fully developed. Skipping the cooling phase can also cause the tops to become sticky or the crust to separate. Always allow your cheesecakes to cool at room temperature before moving them to the fridge.
Conclusion
Mini Oreo cheesecakes are more than just a dessert — they’re a delightful blend of nostalgia, indulgence, and pure joy in a bite-sized form. Whether you’re making them for a birthday party, holiday event, or just a cozy weekend treat, these cheesecakes never fail to impress. With a few basic ingredients, the right tools, and a little love, you can whip up a batch that’s as good as (if not better than) anything you’d find at a bakery.
From classic creamy versions to peppermint, peanut butter, or mocha twists, the possibilities are endless. And now that you’ve got all the tips, techniques, and storage secrets under your belt, you’re ready to bake like a pro.
So, grab your muffin tin, stock up on Oreos, and let the baking begin. Your taste buds — and everyone you share with — will thank you.🍪🧁🎂
Mini Oreo Cheesecakes
Equipment
- 12-cup muffin tin
- Paper cupcake liners
- Mixing bowls
- Electric hand or stand mixer
- Rubber spatula
- Measuring cups and spoons
- Food processor or rolling pin and zip-top bag
- Ice cream scoop (optional)
- Cooling rack
Ingredients
- For the Crust:
- 16 Oreo cookies with cream
- 3 tablespoons unsalted butter melted
- For the Filling:
- 16 oz 450g full-fat cream cheese, softened
- ½ cup granulated sugar
- 1 teaspoon pure vanilla extract
- 2 large eggs
- ½ cup sour cream or Greek yogurt
- Pinch of salt
- 6 crushed Oreos optional for folding into batter
- For Garnish Optional:
- Whipped cream
- Crushed Oreo crumbs
- Mini Oreo cookies
Instructions
- Preheat oven to 325°F (163°C). Line a muffin tin with cupcake liners.
- Make the crust: Crush Oreos using a food processor or zip-top bag and rolling pin. Mix with melted butter. Press 1 tablespoon of mixture into each liner. Bake for 5 minutes. Set aside.
- Prepare filling: In a large bowl, beat cream cheese until smooth. Add sugar and vanilla, mix until combined. Add eggs one at a time, mixing on low speed. Gently fold in sour cream and crushed Oreos.
- Fill liners: Spoon cheesecake batter over the crusts, filling each cup almost to the top.
- Bake for 16–18 minutes, or until centers are set but slightly jiggly. Turn off oven, crack door open, and let cheesecakes cool inside for 5–10 minutes.
- Cool completely at room temperature, then chill in the fridge for at least 2 hours (preferably overnight).
- Garnish and serve: Top with whipped cream, crushed Oreos, or mini Oreo cookies.